Prerequisites
- An Azure subscription - Create one for free
- Azure Contributor or Cognitive Services Contributor role
- A Foundry resource in a region with available PTU quota
- Azure CLI - Install the Azure CLI (required only for CLI-based deployment)
Verify PTU quota availability
Provisioned throughput deployments are sized in units called Provisioned Throughput Units (PTUs). PTU quota for each provisioned deployment type is granted to a subscription regionally and limits the total number of PTUs that can be deployed in that region across all models and versions. Creating a new deployment requires available (unused) quota to cover the desired size of the deployment. For example: If a subscription has the following in South Central US:- Total PTU Quota = 500 PTUs
- Deployments:
- 100 PTUs: GPT-4o, 2024-05-13
- 100 PTUs: DeepSeek-R1, 1
Create a Foundry resource
Provisioned deployments are created via Foundry resource objects within Azure. You must have a Foundry resource in each region where you intend to create a deployment.Foundry resources can support multiple types of Foundry deployments at the same time. It is not necessary to dedicate new resources for your provisioned deployments.
Discover models with provisioned deployment option
Once you have verified your quota, you can create a deployment. Navigate to Foundry model catalog to discover the models with provisioned deployment options.- Sign in to Microsoft Foundry. Make sure the New Foundry toggle is on. These steps refer to Foundry (new).

- From the Foundry portal homepage, choose the subscription that was enabled for provisioned deployments & select the desired resource in a region where you have the quota.
- Select Discover in the upper-right navigation, then Models in the left pane.
- Select the Collections filter and filter by Direct from Azure to see the models held and served by Azure directly. A selection of these models support provisioned throughput deployment option.
- Select the model that you want to deploy to open its model card.
- Select Deploy > Custom settings to customize your deployment.
- Select the Deployment type drop down menu to see if provisioned deployment is available for the model.
Create your provisioned deployment - capacity is available
You can create your deployment programmatically, using the following Azure CLI command. To specify the deployment type, modify thesku-name to GlobalProvisionedManaged, DataZoneProvisionedManaged, or ProvisionedManaged based on the intended deployment type. Update the sku-capacity with the desired number of provisioned throughput units.
sku.name with GlobalProvisionedManaged, DataZoneProvisionedManaged, or ProvisionedManaged rather than Standard.
Optionally purchase a reservation
Following the creation of your deployment, you might want to purchase a term discount via an Azure Reservation. An Azure Reservation can provide a substantial discount on the hourly rate for users intending to use the deployment beyond a few days. For more information on the purchase model and reservations, see:- Save costs with Microsoft Foundry provisioned throughput reservations.
- Foundry provisioned throughput onboarding guide
- Guide for Foundry provisioned throughput reservations
Capacity availability for model deployments is dynamic and changes frequently across regions and models. To prevent you from purchasing a reservation for more PTUs than you can use, create deployments first, and then purchase the Azure Reservation to cover the PTUs you have deployed. This best practice will ensure that you can take full advantage of the reservation discount and prevent you from purchasing a term commitment that you cannot use.
Make your first inferencing calls
The inferencing code for provisioned deployments is the same as a standard deployment type. The following code snippet shows a chat completions call to a GPT-4 model. For your first time using these models programmatically, we recommend starting with our quickstart guide. Our recommendation is to use the OpenAI library with version 1.0 or greater since this includes retry logic within the library.For production, use a secure way of storing and accessing your credentials like Azure Key Vault. For more information about credential security, see this security article.
Understand expected throughput
The amount of throughput that you can achieve on the endpoint is a factor of the number of PTUs deployed, input size, output size, and call rate. The number of concurrent calls and total tokens processed can vary based on these values.Measure deployment utilization
When you deploy a specified number of provisioned throughput units (PTUs), a set amount of inference throughput is made available to that endpoint. Utilization of this throughput is a complex formula based on the model, model-version call rate, prompt size, generation size. To simplify this calculation, we provide a utilization metric in Azure Monitor. Your deployment returns a 429 on any new calls after the utilization rises above 100%. The Provisioned utilization is defined as follows: PTU deployment utilization = (PTUs consumed in the time period) / (PTUs deployed in the time period) You can find the utilization measure in the Azure-Monitor section for your resource. To access the monitoring dashboards sign-in to https://portal.azure.com, go to your Azure OpenAI resource and select the Metrics page from the left nav. On the metrics page, select the ‘Provisioned-managed utilization V2’ metric. If you have more than one deployment in the resource, you should also split the values by each deployment by selecting the ‘Apply Splitting’ button.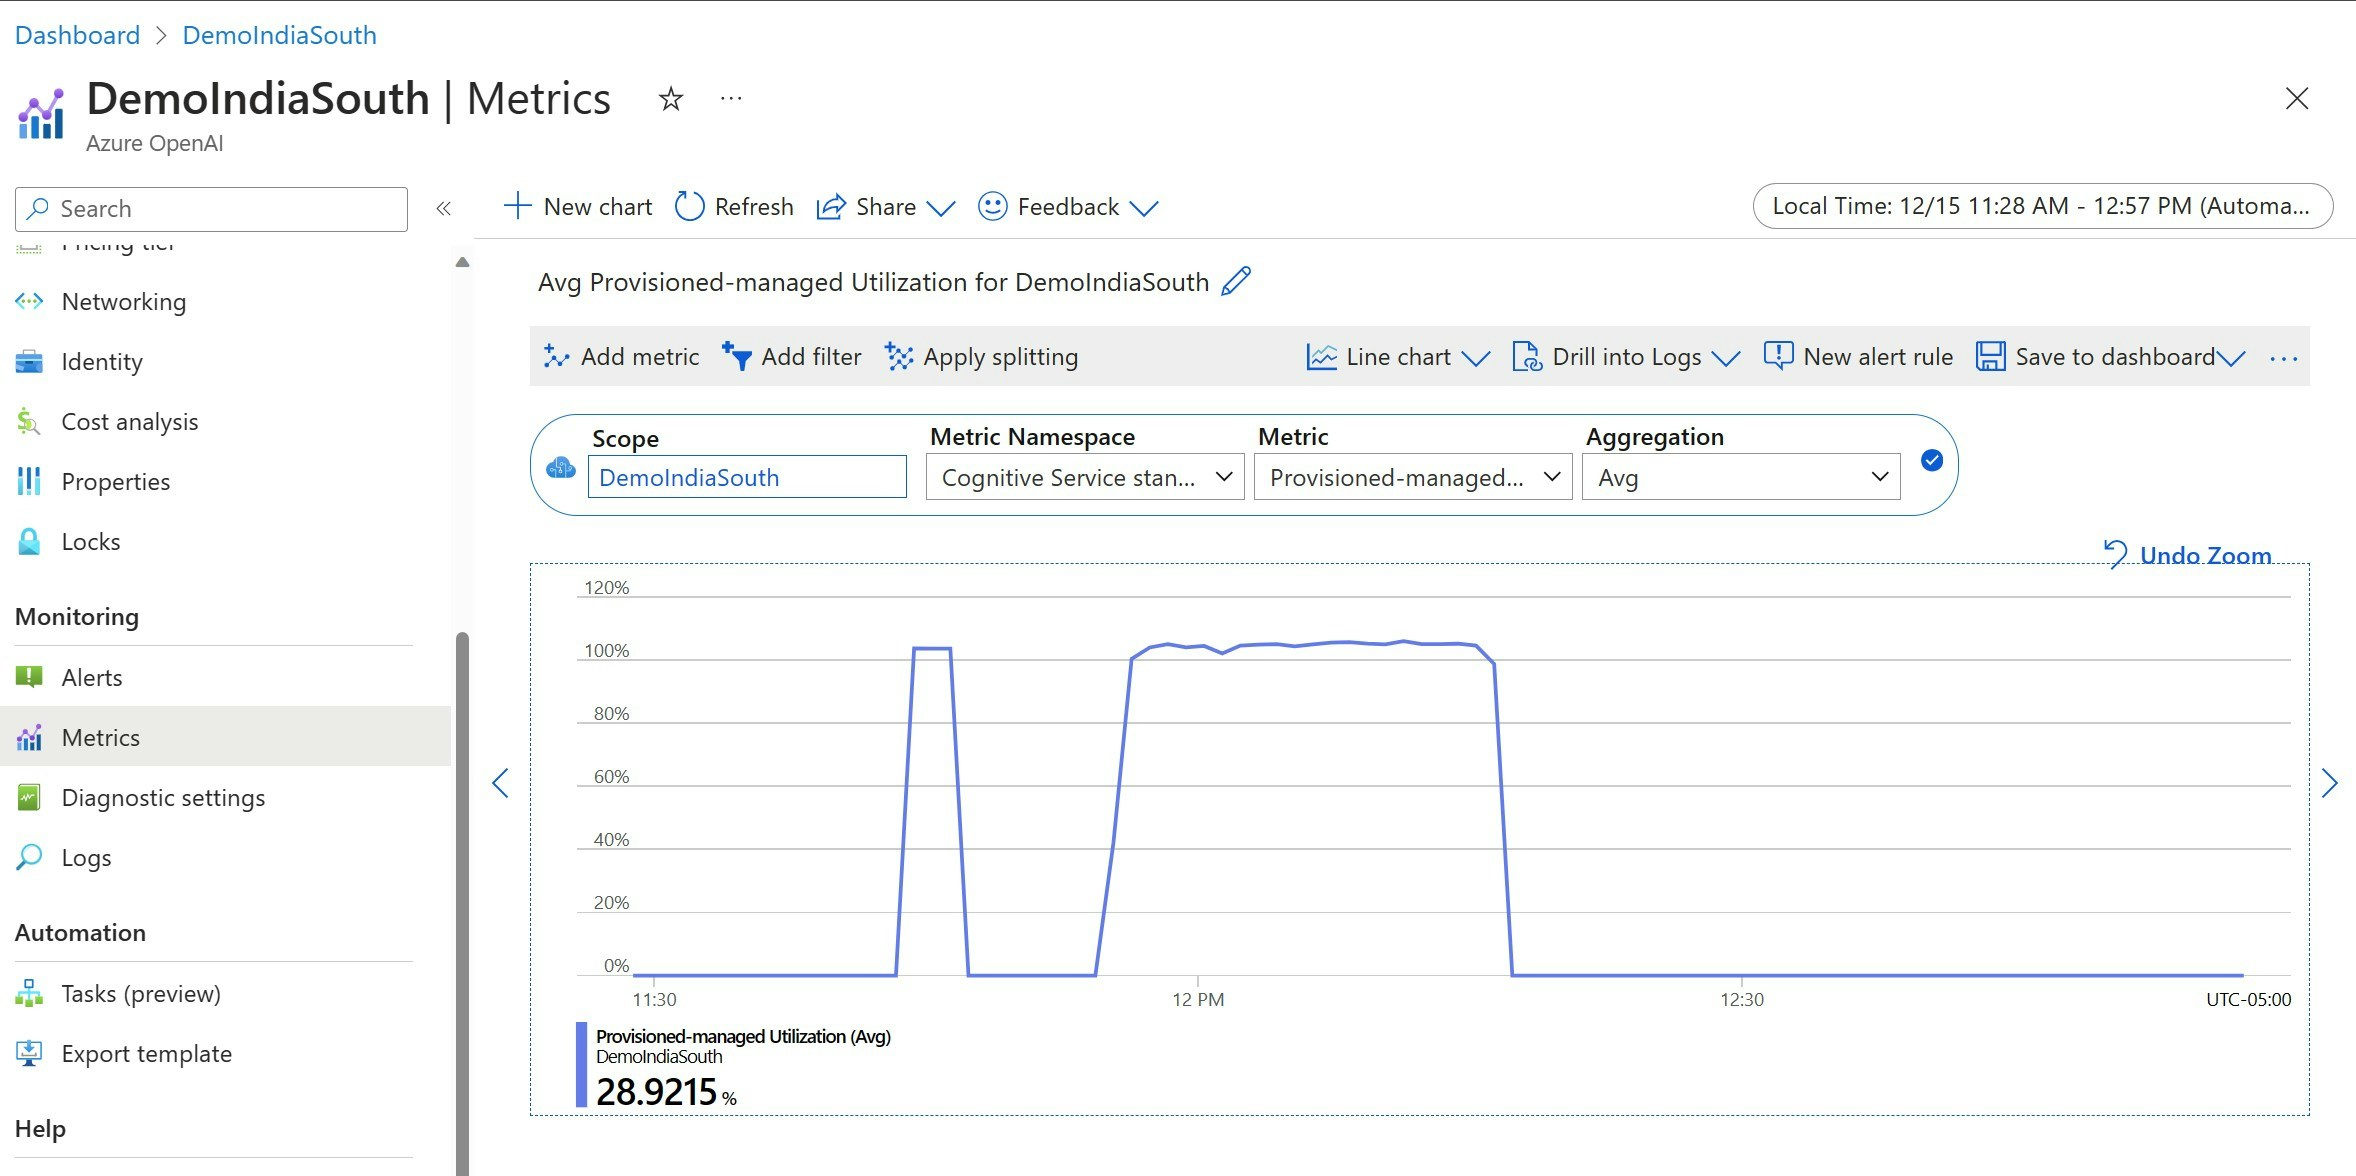
Handle high utilization
Provisioned deployments provide you with an allocated amount of compute capacity to run a given model. The ‘Provisioned-Managed Utilization V2’ metric in Azure Monitor measures the utilization of the deployment in one-minute increments. Provisioned-Managed deployments are also optimized so that calls accepted are processed with a consistent per-call max latency. When the workload exceeds its allocated capacity, the service returns a 429 HTTP status code until the utilization drops down below 100%. The time before retrying is provided in theretry-after and retry-after-ms response headers that provide the time in seconds and milliseconds respectively. This approach maintains the per-call latency targets while giving the developer control over how to handle high-load situations – for example retry or divert to another experience/endpoint.
What should I do when I receive a 429 response?
A 429 response indicates that the allocated PTUs are fully consumed at the time of the call. The response includes theretry-after-ms and retry-after headers that tell you the time to wait before the next call will be accepted. How you choose to handle a 429 response depends on your application requirements. Here are some considerations:
- If you are okay with longer per-call latencies, implement client-side retry logic to wait the
retry-after-mstime and retry. This approach lets you maximize the throughput on the deployment. Microsoft-supplied client SDKs already handle it with reasonable defaults. You might still need further tuning based on your use-cases. - Consider redirecting the traffic to other models, deployments, or experiences. This approach is the lowest-latency solution because this action can be taken as soon as you receive the 429 signal. The 429 signal isn’t an unexpected error response when pushing to high utilization but instead part of the design for managing queuing and high load for provisioned deployments.
Modifying retry logic within the client libraries
The Azure OpenAI SDKs retry 429 responses by default and behind the scenes in the client (up to the maximum retries). The libraries respect theretry-after time. You can also modify the retry behavior to better suit your experience. Here’s an example with the python library.
You can use the max_retries option to configure or disable retry settings:
Run a benchmark
The exact performance and throughput capabilities of your instance depends on the kind of requests you make and the exact workload. The best way to determine the throughput for your workload is to run a benchmark on your own data. To assist you in this work, the benchmarking tool provides a way to easily run benchmarks on your deployment. The tool comes with several possible preconfigured workload shapes and outputs key performance metrics. Learn more about the tool and configuration settings in our GitHub Repo: https://github.com/Azure/azure-openai-benchmark. We recommend the following workflow:- Estimate your throughput PTUs using the capacity calculator.
- Run a benchmark with this traffic shape for an extended period of time (10+ min) to observe the results in a steady state.
- Observe the utilization, tokens processed and call rate values from benchmark tool and Azure Monitor.
- Run a benchmark with your own traffic shape and workloads using your client implementation. Be sure to implement retry logic using either an Azure OpenAI client library or custom logic.
Related content
- For more information on cloud application best practices, check out Best practices in cloud applications
- For more information on provisioned deployments, check out What is provisioned throughput?
- For more information on retry logic within each SDK, check out: