- Set up your agent environment (this article).
- Create and configure your agent.
Required permissions
| Action | Required Role |
|---|---|
| Create an account and project | Foundry Account Owner |
| standard setup Only: Assign RBAC for required resources (Cosmos DB, Search, Storage, etc.) | Role Based Access Control Administrator |
| Create and edit agents | Foundry User |
The Foundry RBAC roles were recently renamed. Foundry User, Foundry Owner, Foundry Account Owner, and Foundry Project Manager were previously named Azure AI User, Azure AI Owner, Azure AI Account Owner, and Azure AI Project Manager. You might still see the previous names in some places while the rename rolls out. The role IDs and core permissions are unchanged by the rename.
For Hosted agents, additional permissions and RBAC configurations are required. See Hosted agent permissions reference for detailed requirements.
Set up your agent environment
To get started, you need a Microsoft Foundry resource and a Foundry project.Agents are created within a specific project, and each project acts as an isolated workspace. This means:
- All agents in the same project share access to the same file storage, thread storage (conversation history), and search indexes.
- Data is isolated between projects. Agents in one project cannot access resources from another. Projects are currently the unit of sharing and isolation in Foundry. See the what is AI foundry article for more information on Foundry projects.
Prerequisites
- An Azure subscription - Create one for free.
- Ensure that the individual creating the account and project has the Foundry Account Owner role at the subscription scope
- If configuring a standard setup, the same individual must also have permissions to assign roles to required resources (Cosmos DB, Azure AI Search, Azure Blob Storage). For more information on RBAC roles, specific to Agent Service, see Agent Service RBAC roles.
- The built-in role needed is Role Based Access Administrator.
- Alternatively, having the Owner role at the subscription level also satisfies this requirement.
- The key permission needed is:
Microsoft.Authorization/roleAssignments/write
Choose your setup
Agent Service offers three environment configuration modes to suit different needs:- Basic Setup: This setup is compatible with OpenAI Assistants and manages agent states using the platform’s built-in storage. It includes the same tools and capabilities as the Assistants API, with added support for non-OpenAI models and tools such as Azure AI Search, and Bing.
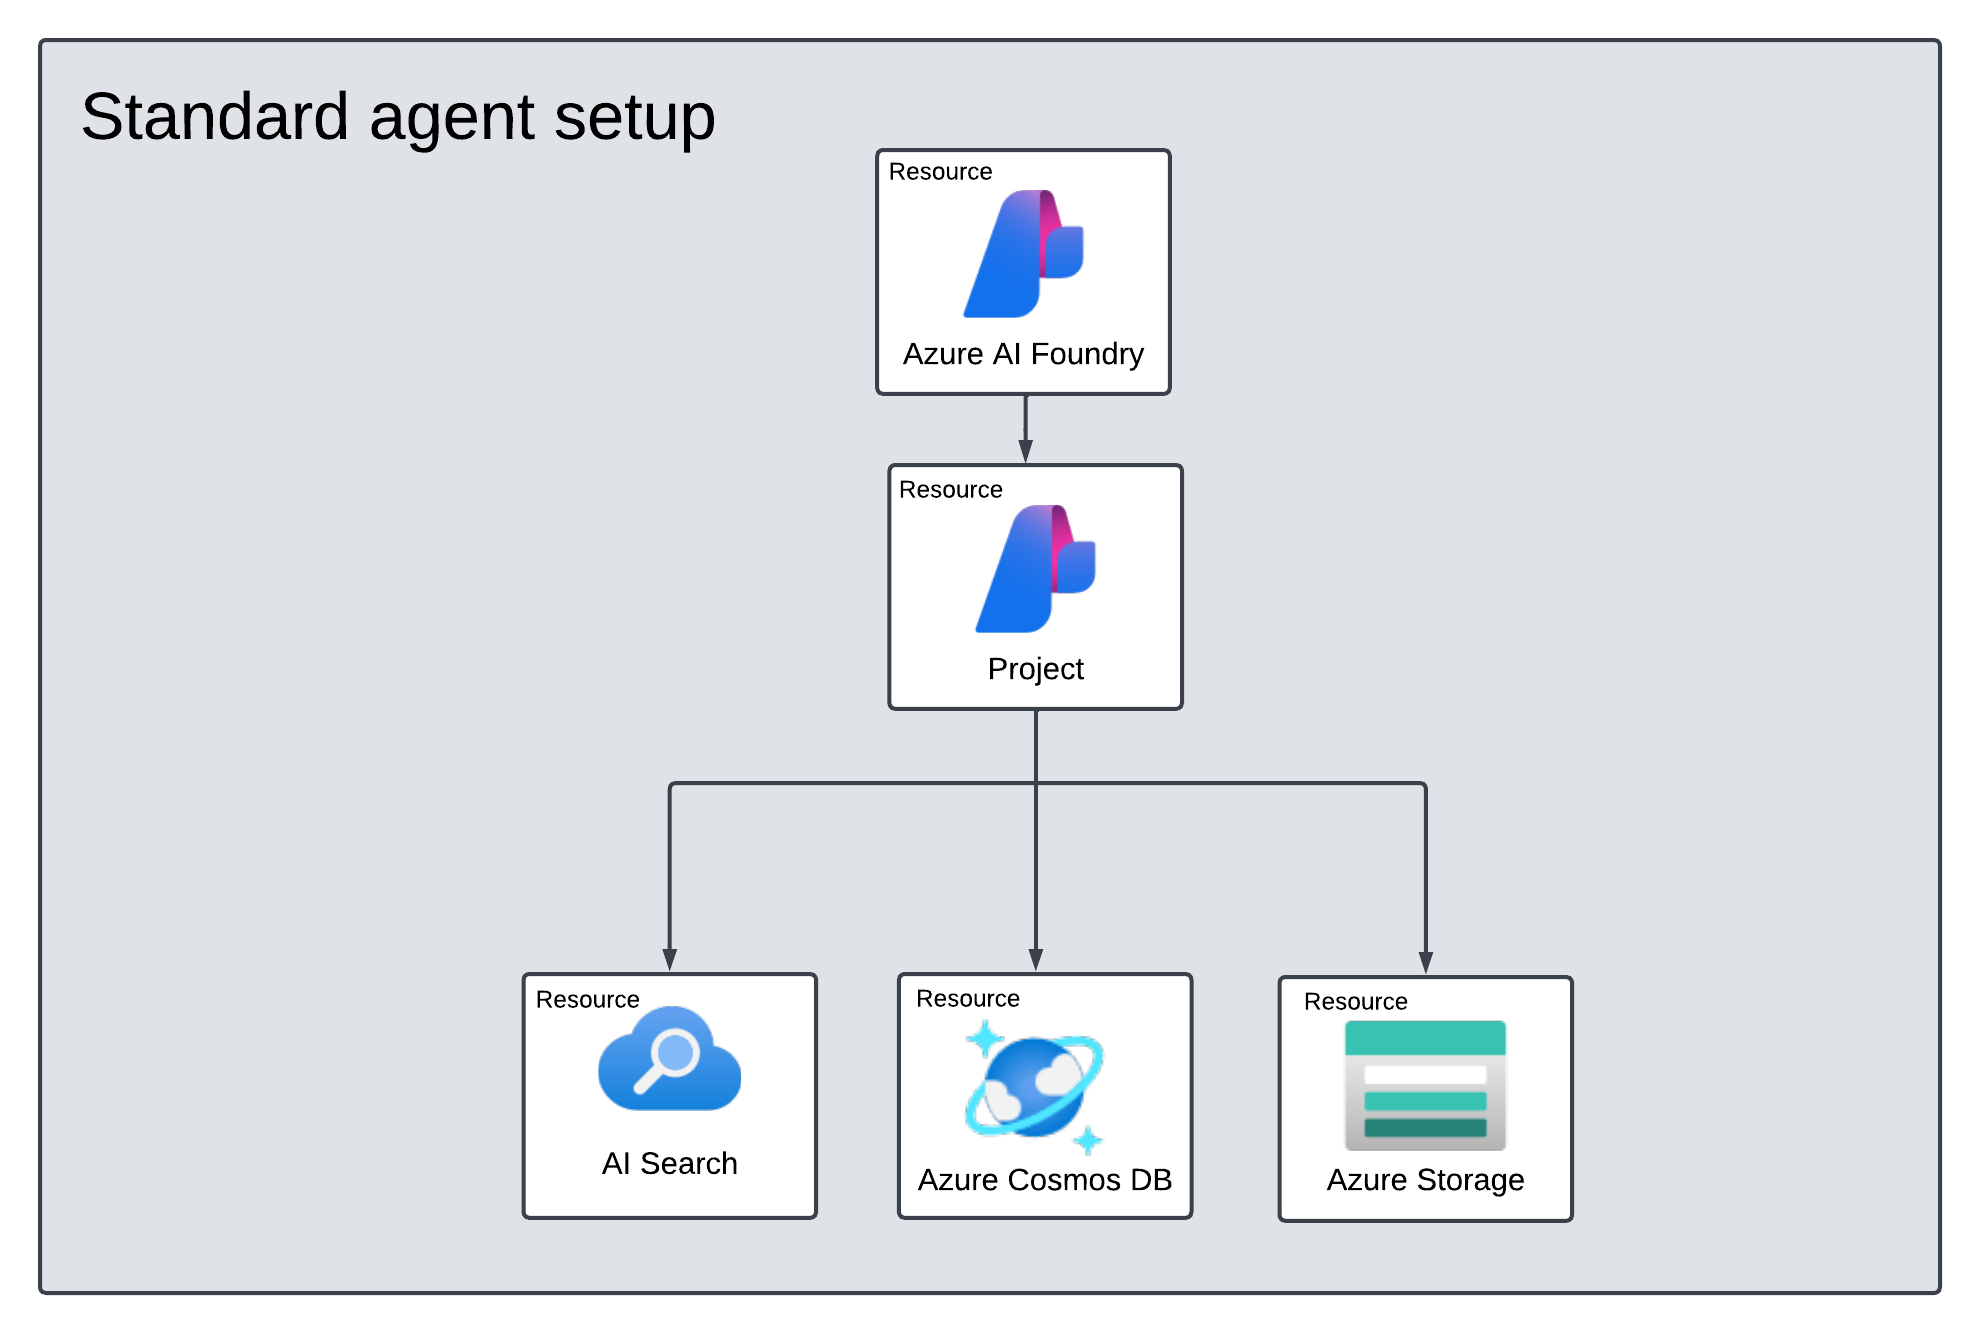
- Standard Setup: Includes everything in the basic setup and fine-grained control over your data by allowing you to use your own Azure resources. All customer data—including files, threads, and vector stores—are stored in your own Azure resources, giving you full ownership and control.
- Standard Setup with Bring Your Own (BYO) Virtual Network: Includes everything in the Standard Setup, with the added ability to operate entirely within your own virtual network. This setup supports Bring Your Own Virtual Network (BYO virtual network), allowing for strict control over data movement and helping prevent data exfiltration by keeping traffic confined to your network environment.
Standard setups require you to Bring Your Own (BYO) resources so that all agent data stays in your Azure tenant.BYO resources include: Azure Storage, Azure AI Search, and Azure Cosmos DB.All data processed by Foundry Agent Service is automatically stored at rest in these resources, helping you meet compliance requirements and enterprise security standards.
Compare setup options
Private Network Isolation in the table below refers to Secured Agent outbound communication. Basic setup doesn’t apply, and you can use Private Network Isolation for your Agents with Standard Setup only.Inbound secured communication can be applied to all of setups below, by adding a private endpoint and disabling the inbound public access for your Foundry Account.
| Use Cases | Basic Setup | Standard Setup with Public Networking | Standard Setup with Private Networking |
|---|---|---|---|
| Get started quickly without managing resources | ✅ | ||
| All conversation history, file, and vector stores are stored in your own resources | ✅ | ✅ | |
| Support for Customer Managed Keys (CMK) | ✅ | ✅ | |
| Private Network Isolation (Bring your own virtual network) | ✅ |
Deployment options
To customize these templates, see use your own resources. If you want support for Private Network Isolation, see network-secured setup for more information on how to bring your own virtual network.| Description and Autodeploy | Diagram (click to zoom in) |
|---|---|
| Deploy a basic agent setup that uses Managed Identity for authentication. An account and project are created. A GPT-4.1 model is deployed. A Microsoft-managed Key Vault is used by default. |
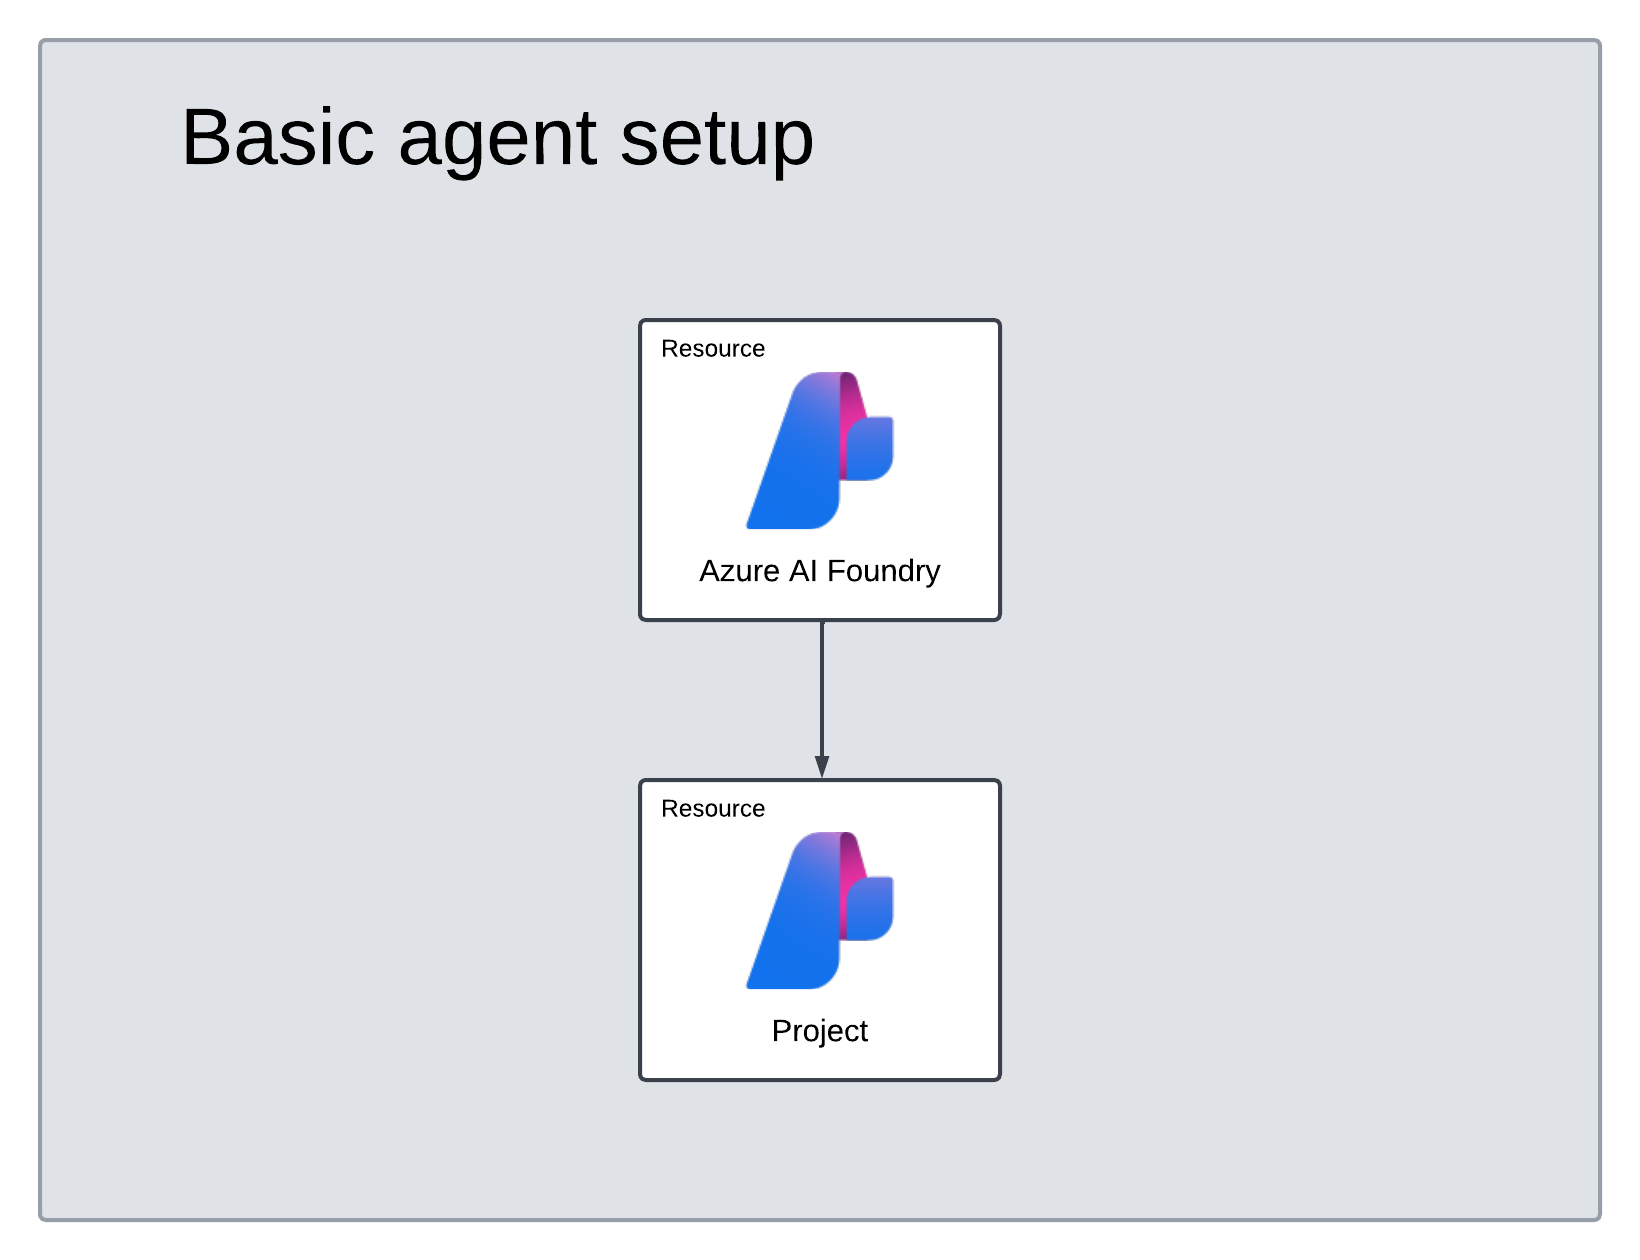
An account and project are created.
A GPT-4.1 model is deployed.
Azure resources for storing customer data—Azure Storage, Azure Cosmos DB, and Azure AI Search—are automatically created if existing resources aren’t provided.
These resources are connected to your project to store files, threads, and vector data.
A Microsoft-managed Key Vault is used by default.
[Optional] Model selection in autodeploy template
Don’t change the modelFormat parameter.The templates only support deployment of Azure OpenAI models. See which Azure OpenAI models are supported in the model support article.
modelName and modelVersion parameters.
By default, the deployment template is configured with the following values:
| Model Parameter | Default Value |
|---|---|
| modelName | gpt-4.1 |
| modelFormat | OpenAI (for Azure OpenAI) |
| modelVersion | 2025-04-14 |
| modelSkuName | GlobalStandard |
| modelLocation | eastus |
Verify your deployment
After deployment completes (typically 5-10 minutes), verify that your resources were created successfully:- Go to the Azure portal.
- Search for your resource group name.
- Confirm that the following resources exist:
- Basic setup: Foundry account, project, and model deployment.
- Standard setup: All basic resources plus Azure Storage account, Azure Cosmos DB account, and Azure AI Search service.
Troubleshooting
| Issue | Cause | Solution |
|---|---|---|
| Deployment fails with quota error | Insufficient quota for GPT-4.1 in the selected region | Request a quota increase or select a different region |
| Permission denied during deployment | Missing Role Based Access Administrator role | Ask your subscription owner to grant you the required role |
| Resources created but agent creation fails | Project not properly connected to resources | Verify the connection in the Foundry portal under Project settings > Connected resources |
| Model not available | Model not deployed in your region | Check model region support and select an available region |