Quickstart: Use images in your AI chats
Get started using images in your chats with Azure OpenAI in Microsoft Foundry Models.This article refers to the Microsoft Foundry (new) portal.
- Extra usage fees might apply when using chat completion models with vision functionality.
- When uploading images, there’s a limit of 10 images per chat request.
- Always set
max_tokensin your API requests, or responses might be truncated.
Prerequisites
- An Azure subscription. Create one for free.
- Once you have your Azure subscription, create an Azure OpenAI resource . For more information about resource creation, see the resource deployment guide.
- A Foundry project with your Azure OpenAI resource added as a connection.
Prepare your media
You need an image to complete this quickstart. You can use this sample image or any other image you have available.
Go to Foundry
- Browse to Foundry and sign in with the credentials associated with your Azure OpenAI resource. During or after the sign-in workflow, select the appropriate directory, Azure subscription, and Azure OpenAI resource.
- Select the project you’d like to work in.
- On the left nav menu, select Models + endpoints and select + Deploy model.
- Choose an image-capable deployment by selecting model name: gpt-4o or gpt-4o-mini. In the window that appears, select a name and deployment type. Make sure your Azure OpenAI resource is connected. For more information about model deployment, see the resource deployment guide.
- Select Deploy.
- Next, select your new model and select Open in playground. In the chat playground, the deployment you created should be selected in the Deployment dropdown.
Playground
In this chat session, you instruct the assistant to aid you in understanding images that you input. For general help with assistant setup, chat sessions, settings, and panels, refer to the Chat quickstart.Start a chat session to analyze images
In this chat session, you’re instructing the assistant to aid in understanding images that you input.- To start, make sure your image-capable deployment is selected in the Deployment dropdown.
- In the context text box on the Setup panel, provide this prompt to guide the assistant:
"You're an AI assistant that helps people find information."Or, you can tailor the prompt to your image or scenario.
We recommend you update the System Message to be specific to the task in order to avoid unhelpful responses from the model.
- Select Apply changes to save your changes.
- In the chat session pane, select the attachment button and then Upload image. Choose your image.
- Add the following prompt in the chat field:
Describe this image, and then select the send icon to submit it. - The send icon is replaced by a stop button. If you select it, the assistant stops processing your request. For this quickstart, let the assistant finish its reply.
- The assistant replies with a description of the image.
- Ask a follow-up question related to the analysis of your image. You could enter,
"What should I highlight about this image to my insurance company?". - You should receive a relevant response similar to what’s shown here:
View and export code
At any point in the chat session, you can enable the Show raw JSON switch at the top of the chat window to see the conversation formatted as JSON. Heres’ what it looks like at the beginning of the quickstart chat session:Clean up resources
If you want to clean up and remove an Azure OpenAI resource, you can delete the resource or resource group. Deleting the resource group also deletes any other resources associated with it. Use this article to get started using the Azure OpenAI REST APIs to deploy and use vision-enabled chat models.Prerequisites
- An Azure subscription. Create one for free.
- Python 3.8 or later version.
- The following Python libraries:
requests,json. - An Azure OpenAI in Microsoft Foundry Models resource with a vision-enabled model deployed. See Model availability for available regions. For more information about resource creation, see the resource deployment guide.
It is currently not supported to turn off content filtering for the GPT-4 Turbo with Vision model.
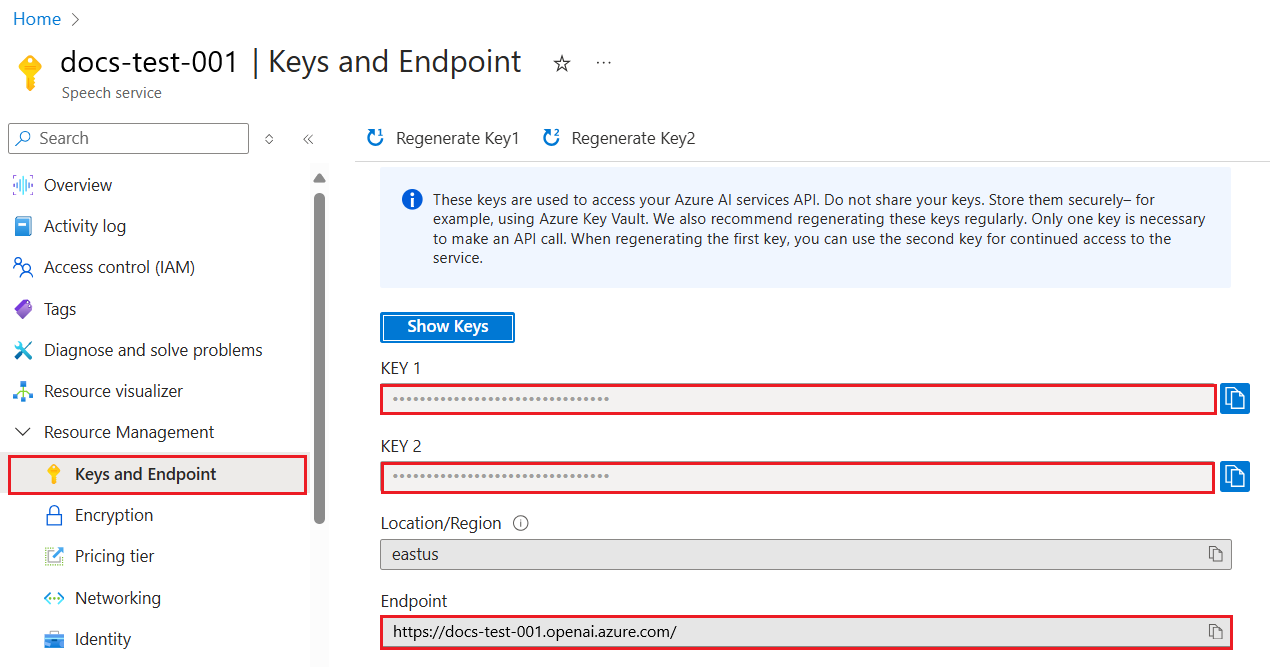
Retrieve key and endpoint
To successfully call the Azure OpenAI APIs, you need the following information about your Azure OpenAI resource:| Variable | Name | Value |
|---|---|---|
| Endpoint | api_base | The endpoint value is located under Keys and Endpoint for your resource in the Azure portal. You can also find the endpoint via the Deployments page in Foundry portal. An example endpoint is: https://docs-test-001.openai.azure.com/. |
| Key | api_key | The key value is also located under Keys and Endpoint for your resource in the Azure portal. Azure generates two keys for your resource. You can use either value. |
Create a new Python application
Create a new Python file named quickstart.py. Open the new file in your preferred editor or IDE.-
Replace the contents of quickstart.py with the following code.
-
Make the following changes:
- Enter your endpoint URL and key in the appropriate fields.
- Enter your model deployment name in the appropriate field.
- Change the value of the
"image"field to the publicly accessible URL of your image.
-
Run the application with the
pythoncommand:
Clean up resources
If you want to clean up and remove an Azure OpenAI resource, you can delete the resource or resource group. Deleting the resource group also deletes any other resources associated with it. Use this article to get started using the Azure OpenAI Python SDK to deploy and use a vision-enabled chat model. Library source code | Package (PyPi) |Prerequisites
- An Azure subscription. Create one for free.
- Python 3.8 or later version.
- An Azure OpenAI in Microsoft Foundry Models resource with a vision-enabled chat model deployed. See Model availability for available regions. For more information about resource creation, see the resource deployment guide.
Microsoft Entra ID prerequisites
For the recommended keyless authentication with Microsoft Entra ID, you need to:- Install the Azure CLI used for keyless authentication with Microsoft Entra ID.
- Assign the
Cognitive Services Userrole to your user account. You can assign roles in the Azure portal under Access control (IAM) > Add role assignment.
Set up
Install the OpenAI Python client library with:This library is maintained by OpenAI. Refer to the release history to track the latest updates to the library.
Retrieve key and endpoint
To successfully make a call against Azure OpenAI, you need an endpoint and a key.| Variable name | Value |
|---|---|
ENDPOINT | The service endpoint can be found in the Keys & Endpoint section when examining your resource from the Azure portal. Alternatively, you can find the endpoint via the Deployments page in Microsoft Foundry portal. An example endpoint is: https://docs-test-001.openai.azure.com/. |
API-KEY | This value can be found in the Keys & Endpoint section when examining your resource from the Azure portal. You can use either KEY1 or KEY2. |
KEY1 or KEY2. Always having two keys allows you to securely rotate and regenerate keys without causing a service disruption.
Environment variables
Create and assign persistent environment variables for your key and endpoint.Create a new Python application
Create a new Python file named quickstart.py. Open the new file in your preferred editor or IDE.-
Replace the contents of quickstart.py with the following code.
-
Make the following changes:
- Make sure the
AZURE_OPENAI_ENDPOINTandAZURE_OPENAI_API_KEYenvironment variables are set. - Enter the name of your model deployment in the
deployment_namevariable. - Change the value of the
"url"field to the publicly accessible URL of your image.
- Make sure the
-
Run the application with the
pythoncommand:
Clean up resources
If you want to clean up and remove an Azure OpenAI resource, you can delete the resource or resource group. Deleting the resource group also deletes any other resources associated with it. Use this article to get started using the OpenAI JavaScript SDK to deploy and use a vision-enabled chat model. This SDK is provided by OpenAI with Azure specific types provided by Azure. Reference documentation | Library source code | Package (npm) | SamplesPrerequisites
- An Azure subscription - Create one for free
- LTS versions of Node.js
- Azure CLI used for passwordless authentication in a local development environment, create the necessary context by signing in with the Azure CLI.
- An Azure OpenAI resource created in a supported region (see Region availability). For more information, see Create a resource and deploy a model with Azure OpenAI.
This library is maintained by OpenAI. Refer to the release history to track the latest updates to the library.
Microsoft Entra ID prerequisites
For the recommended keyless authentication with Microsoft Entra ID, you need to:- Install the Azure CLI used for keyless authentication with Microsoft Entra ID.
- Assign the
Cognitive Services Userrole to your user account. You can assign roles in the Azure portal under Access control (IAM) > Add role assignment.
Set up
-
Create a new folder
vision-quickstartand go to the quickstart folder with the following command: -
Create the
package.jsonwith the following command: -
Install the OpenAI client library for JavaScript with:
-
For the recommended passwordless authentication:
Retrieve resource information
You need to retrieve the following information to authenticate your application with your Azure OpenAI resource:- Microsoft Entra ID
- API key
| Variable name | Value |
|---|---|
AZURE_OPENAI_ENDPOINT | This value can be found in the Keys and Endpoint section when examining your resource from the Azure portal. |
AZURE_OPENAI_DEPLOYMENT_NAME | This value will correspond to the custom name you chose for your deployment when you deployed a model. This value can be found under Resource Management > Model Deployments in the Azure portal. |
To use the recommended keyless authentication with the SDK, make sure that the
AZURE_OPENAI_API_KEY environment variable isn’t set.Create a new JavaScript application for image prompts
Select an image from the azure-samples/cognitive-services-sample-data-files. Enter your publicly accessible image URL in the code below or set theIMAGE_URL environment variable to it.
If you use a SAS URL to an image stored in Azure blob storage, you need to enable Managed Identity and assign the Storage Blob Reader role to your Azure OpenAI resource (do this in the Azure portal). This allows the model to access the image in blob storage.
- Microsoft Entra ID
- API key
-
Create the
index.jsfile with the following code: -
Sign in to Azure with the following command:
-
Run the JavaScript file.
Clean up resources
If you want to clean up and remove an Azure OpenAI resource, you can delete the resource or resource group. Deleting the resource group also deletes any other resources associated with it. Use this article to get started using the OpenAI JavaScript SDK to deploy and use a vision-enabled chat model. This SDK is provided by OpenAI with Azure specific types provided by Azure. Reference documentation | Library source code | Package (npm) | SamplesPrerequisites
- An Azure subscription - Create one for free
- LTS versions of Node.js
- TypeScript
- Azure CLI used for passwordless authentication in a local development environment, create the necessary context by signing in with the Azure CLI.
- An Azure OpenAI resource created in a supported region (see Region availability). For more information, see Create a resource and deploy a model with Azure OpenAI.
This library is maintained by OpenAI. Refer to the release history to track the latest updates to the library.
Microsoft Entra ID prerequisites
For the recommended keyless authentication with Microsoft Entra ID, you need to:- Install the Azure CLI used for keyless authentication with Microsoft Entra ID.
- Assign the
Cognitive Services Userrole to your user account. You can assign roles in the Azure portal under Access control (IAM) > Add role assignment.
Set up
-
Create a new folder
vision-quickstartand go to the quickstart folder with the following command: -
Create the
package.jsonwith the following command: -
Update the
package.jsonto ECMAScript with the following command: -
Install the OpenAI client library for JavaScript with:
-
For the recommended passwordless authentication:
Retrieve resource information
You need to retrieve the following information to authenticate your application with your Azure OpenAI resource:- Microsoft Entra ID
- API key
| Variable name | Value |
|---|---|
AZURE_OPENAI_ENDPOINT | This value can be found in the Keys and Endpoint section when examining your resource from the Azure portal. |
AZURE_OPENAI_DEPLOYMENT_NAME | This value will correspond to the custom name you chose for your deployment when you deployed a model. This value can be found under Resource Management > Model Deployments in the Azure portal. |
To use the recommended keyless authentication with the SDK, make sure that the
AZURE_OPENAI_API_KEY environment variable isn’t set.Create a new JavaScript application for image prompts
Select an image from the azure-samples/cognitive-services-sample-data-files. Use the image URL in the code below or set theIMAGE_URL environment variable to the image URL.
- Microsoft Entra ID
- API key
-
Create the
index.tsfile with the following code: -
Create the
tsconfig.jsonfile to transpile the TypeScript code and copy the following code for ECMAScript. -
Transpile from TypeScript to JavaScript.
-
Sign in to Azure with the following command:
-
Run the code with the following command:
Clean up resources
If you want to clean up and remove an Azure OpenAI resource, you can delete the resource or resource group. Deleting the resource group also deletes any other resources associated with it. Use this article to get started using the Azure OpenAI .NET SDK to deploy and use a vision-enabled chat model.Prerequisites
- An Azure subscription. You can create one for free.
- The .NET 8.0 SDK
- An Azure OpenAI in Microsoft Foundry Models resource with a vision-enabled chat model deployed. See Model availability for available regions. For more information about resource creation, see the resource deployment guide.
Microsoft Entra ID prerequisites
For the recommended keyless authentication with Microsoft Entra ID, you need to:- Install the Azure CLI used for keyless authentication with Microsoft Entra ID.
- Assign the
Cognitive Services Userrole to your user account. You can assign roles in the Azure portal under Access control (IAM) > Add role assignment.
Set up
-
Create a new folder
vision-quickstartand go to the quickstart folder with the following command: -
Create a new console application with the following command:
-
Install the OpenAI .NET client library with the dotnet add package command:
-
For the recommended keyless authentication with Microsoft Entra ID, install the Azure.Identity package with:
-
For the recommended keyless authentication with Microsoft Entra ID, sign in to Azure with the following command:
Retrieve resource information
You need to retrieve the following information to authenticate your application with your Azure OpenAI resource:- Microsoft Entra ID
- API key
| Variable name | Value |
|---|---|
AZURE_OPENAI_ENDPOINT | This value can be found in the Keys and Endpoint section when examining your resource from the Azure portal. |
AZURE_OPENAI_DEPLOYMENT_NAME | This value will correspond to the custom name you chose for your deployment when you deployed a model. This value can be found under Resource Management > Model Deployments in the Azure portal. |
Run the quickstart
The sample code in this quickstart uses Microsoft Entra ID for the recommended keyless authentication. If you prefer to use an API key, you can replace theDefaultAzureCredential object with an AzureKeyCredential object.
-
Replace the contents of
Program.cswith the following code and update the placeholder values with your own. -
Replace
YOUR_IMAGE_URLwith the publicly accessible of the image you want to upload. -
Run the application using the
dotnet runcommand or the run button at the top of Visual Studio:
Output
The output of the application will be a description of the image you provided in theimageUri variable. The assistant will analyze the image and provide a detailed description based on its content.