Items marked preview in this article are currently in preview. This preview is provided without a service-level agreement, and Microsoft doesn’t recommend it for production workloads. Certain features might not be supported or might have constrained capabilities. For more information, see Supplemental Terms of Use for Microsoft Azure Previews.
Prerequisites
- A Foundry project.
- An Azure Monitor Application Insights resource to store traces (create a new one or connect an existing one).
- Access to the Application Insights resource connected to your project.
- Permission to assign Azure roles on the connected Application Insights resource, such as User Access Administrator at minimum. See prerequisites for assigning roles via the Azure portal.
- Local authentication disabled on the connected Application Insights resource to enforce Microsoft Entra ID-only ingestion.
- To view traces in Foundry, the Log Analytics Reader role on the connected Application Insights resource. If the underlying Log Analytics tables are protected, also assign Privileged Monitoring Data Reader.
Connect Application Insights to your Foundry project
Foundry stores traces in Application Insights by using OpenTelemetry semantic conventions.Update an existing connection
If your project already has a connection to Application Insights and you want to convert it to use Microsoft Entra authentication, follow these steps. If you don’t have an existing connection, skip to Create a new connection.- Select Manage in the upper-right navigation, and then select Project details.
- Select the existing Application Insights connection, and then select Edit authentication.

- Select Project managed identity, and then select Save.

Create a new connection
- Sign in to Microsoft Foundry. Make sure the New Foundry toggle is on. These steps refer to Foundry (new).

- Open your Foundry project.
- In the left navigation, select Agents.
- At the top, select Traces.
- On the right, select Connect to create or connect an Application Insights resource.

- To connect an existing resource, select the resource, and then select Connect.
- To create a new resource, select Create new, and then complete the wizard.
- In the connection creation experience, set Auth type to Project Managed Identity.

- Complete the wizard and select Create.
Use the project details connection path
If you don’t see the message bar or Connect button, use this alternative way to enable Azure Monitor Application Insights.- Select Manage in the upper-right navigation, and then select Project details.
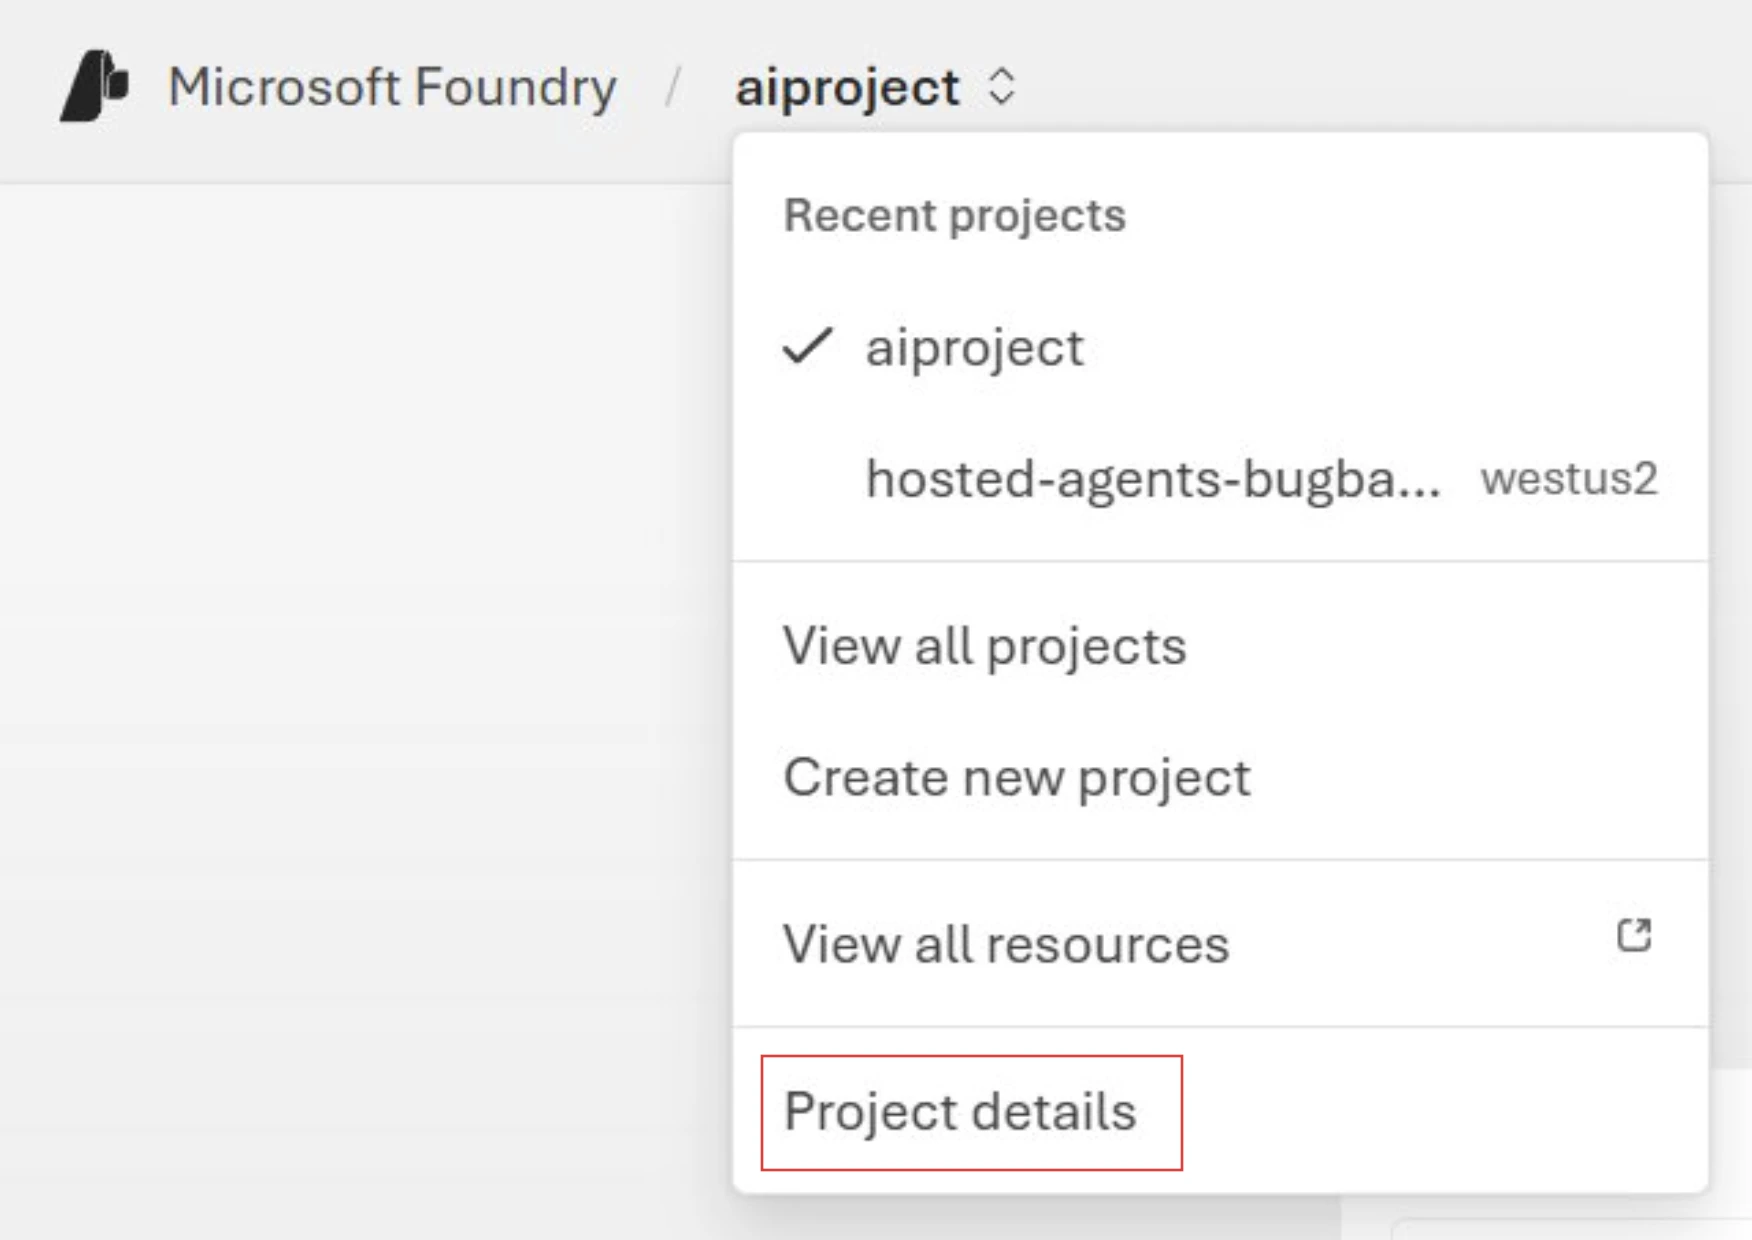
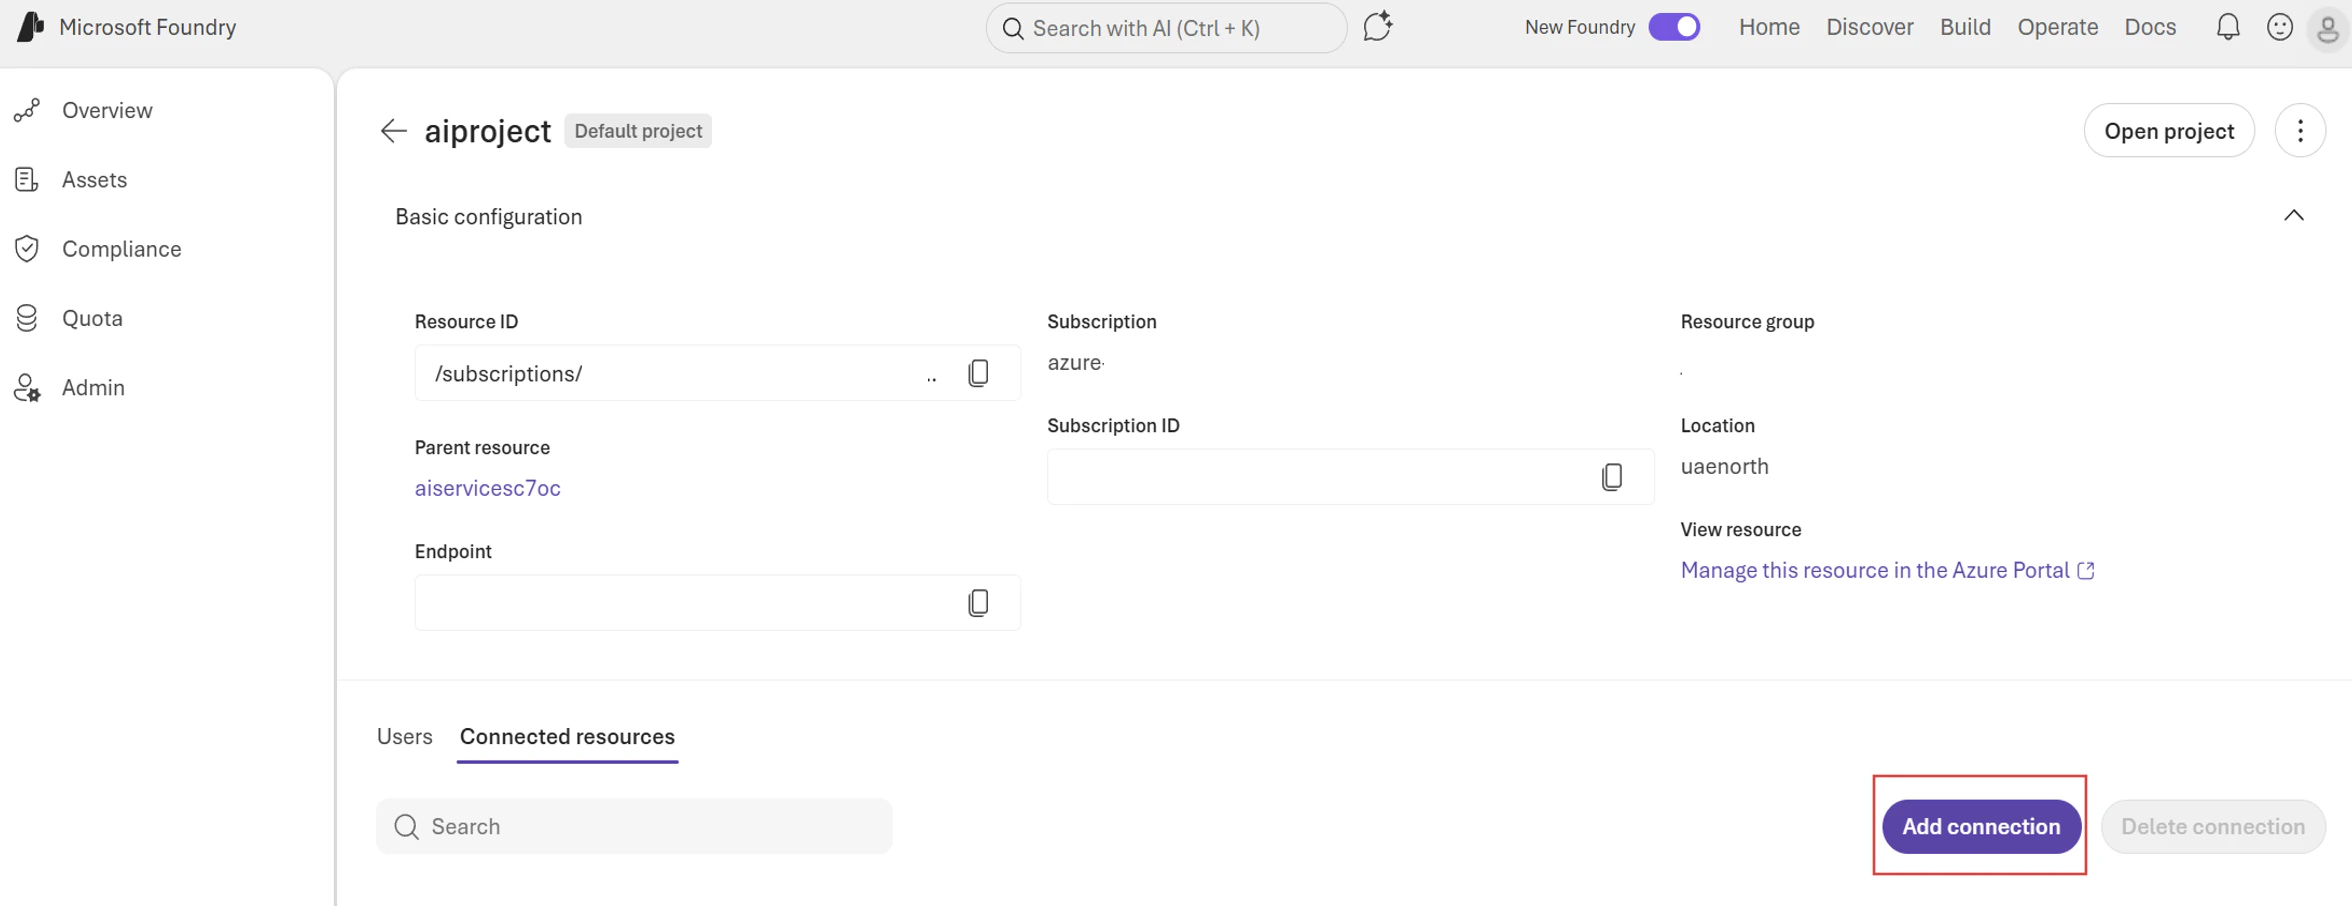
- Select the Connected resources tab, and then select Add connection.
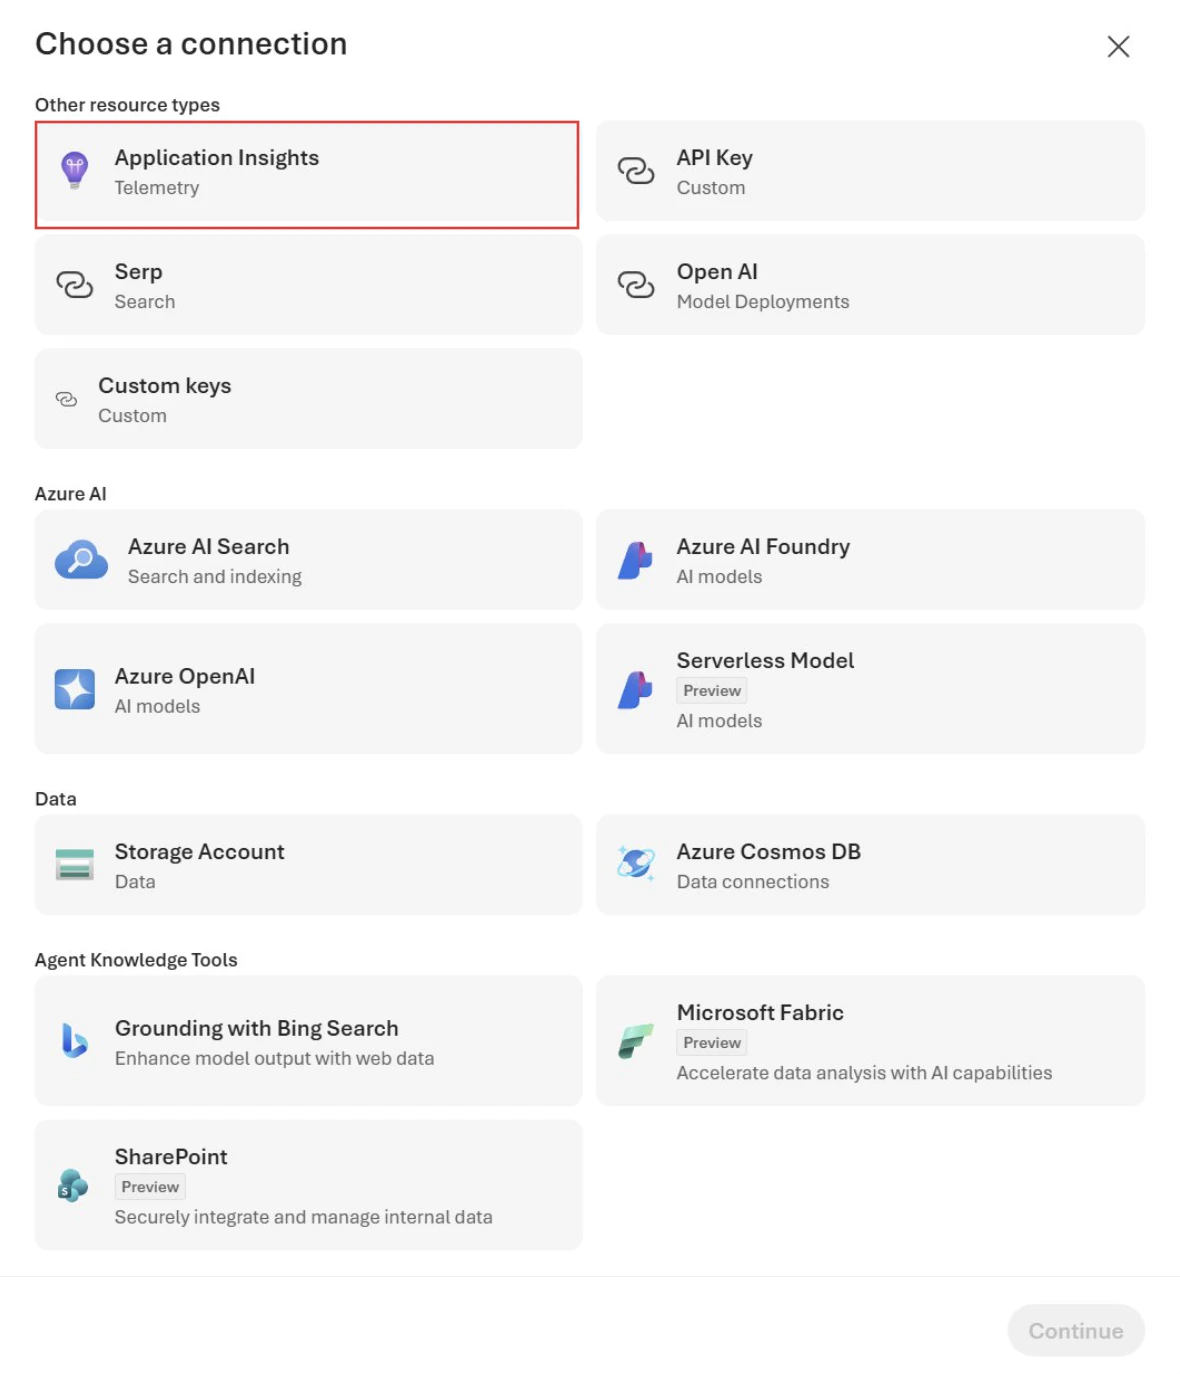
- In Choose a connection, select Application Insights.
- Before you select Connect, in the connection creation experience, set Auth type to Project Managed Identity.

When you create the connection from the Foundry portal with Auth type set to Project managed identity, the Foundry portal assigns the Monitoring Metrics Publisher role to the Foundry project managed identity.
Set up Entra authentication for hosted agent traces
For hosted agents, in addition to setting up the connection by using Project Managed Identity, you also need to grant the Agent Identity permission on the connected Application Insights resource. This permission is required because hosted agent traces can come from two identities:- Foundry Agent Service emits server-side traces by using project managed identity.
- Agent emits traces from code that runs in the hosted agent sandbox by using Agent Identity.
- Foundry portal
- Azure CLI
- In the Azure portal, open the Application Insights resource connected to your Foundry project.
- Select Access control (IAM).
- Select Add > Add role assignment.
- Select Monitoring Metrics Publisher, and then select Next.
- In Members, select the Agent Identity of hosted agent.
- Select Review + assign.