langchain-azure-ai package to connect LangGraph and LangChain applications to Foundry Agent Service. This article walks through practical
scenarios, from using existing agents and composing multi-agent graphs to
tool-enabled workflows, human-in-the-loop approvals, and tracing.
Prerequisites
- An Azure subscription. Create one for free.
- A Foundry project.
- A deployed chat model (for example,
gpt-4.1) in your project. - Python 3.10 or later.
- Azure CLI signed in (
az login) soDefaultAzureCredentialcan authenticate.
- The Code Interpreter example requires a supported region and model.
- The image generation example requires a
gpt-image-1.5deployment. Deploy the model in your project. If needed, apply for model access. - The file search example requires a vector store that contains at least one indexed file. For setup instructions, see Use the file search tool.
Configure your environment
Install the packagelangchain-azure-ai to use Microsoft Foundry capabilities in LangGraph and LangChain.
Using Foundry Agent Service agents
The classAgentServiceFactory is your starting point to compose agents in LangGraph that interact with the Agent Service in Foundry.
The factory creates LangGraph-compatible nodes that run through Agent Service and that can be used to compose more complex solutions
with LangGraph.
Create the agent factory by connecting the AgentServiceFactory class to a Foundry project. All agents you create or reference through this factory are managed
within the project and visible in the Foundry portal (new).
Migrating from Foundry classic: Agents created with
langchain_azure_ai.agents.v1.AgentServiceFactory are only visible in the Foundry portal (classic).Use an existing agent
We recommend creating and configuring agents in the Foundry portal or Foundry SDK and then reference them by name withget_agent_node to compose graphs. This approach is recommended because it keeps agent configuration centralized in the Foundry and lets your code focus on orchestration. You can also create agents programmatically with create_prompt_agent when you need to define agents entirely in code.
version="latest" to always target the most recent version, or pin a specific version number for stability.
Test that your agent can run:
Conversations and state
Nodes attached to the Agent Service automatically track responses in conversations. Theazure_ai_agents_conversation_id property is added to the state so you can reference or continue conversations:
Compose graphs with existing agents
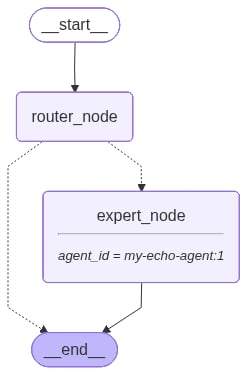
You can use Agent Service nodes just like any other node in LangGraph to build complex graphs. The following example builds a conditional routing graph where a localrouter_node inspects the user message and decides whether to delegate to a Foundry agent.
StateGraph with two nodes. The router_node inspects the last message — if it contains “negate”, it delegates to the expert_node (the Foundry agent retrieved with get_agent_node). Otherwise, the router handles the request locally and ends the graph. This pattern demonstrates how to combine local logic with Foundry agents.
The graph looks as follows:
Create a basic prompt agent
When you need to define agents entirely in code — for example, during prototyping or when agent configuration should live alongside your application — usecreate_prompt_agent. Start with a minimal ReAct-style prompt agent to verify your integration.
CompiledStateGraph that uses it. The agent
is immediately visible in your Foundry portal under Agents.
The factory.get_agents_id_from_graph method retrieves the
Foundry-assigned agent name and version from the compiled graph.
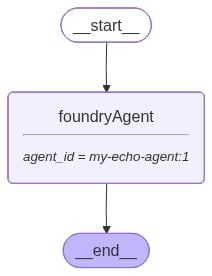
You can visualize how the agent got created and used within the LangGraph
graph by printing its diagram representation. The node foundryAgent runs
in the Foundry Agent Service. Notice how the agent name and version is
visible in the graph.
Add tools to your agent
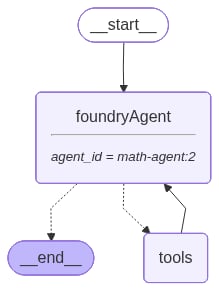
You can add tools to your agent to perform actions. The methodcreate_prompt_agent implements
the agent loop for you.
You should distinguish two types of tools:
- Local tools: Those are tools that run colocated where your agent code is running. They can be callable functions or any function available for LangChain/LangGraph ecosystem.
- Built-in tools: Those are tools that can run exclusively in the Foundry Agent Service; server-side. Server-side tools can only be applied to Foundry agents.
Add local tools
You can define local Python functions and attach them as tools. This pattern is useful for deterministic business logic and utility operations.create_prompt_agent function and invoke the agent with a multi-step arithmetic problem:
AzureAIDocumentIntelligenceTool to parse the
document and returns the result. Expected output: “The total amount in the
invoice is $144.00.”
Add built-in tools
Built-in tools in Foundry Agent Service run server-side instead of in a tool node like local tools. Tools in the namespacelangchain_azure_ai.agents.prebuilt.tools.*
are all built-in tools and only work with create_prompt_agent.
Example: use code interpreter tool
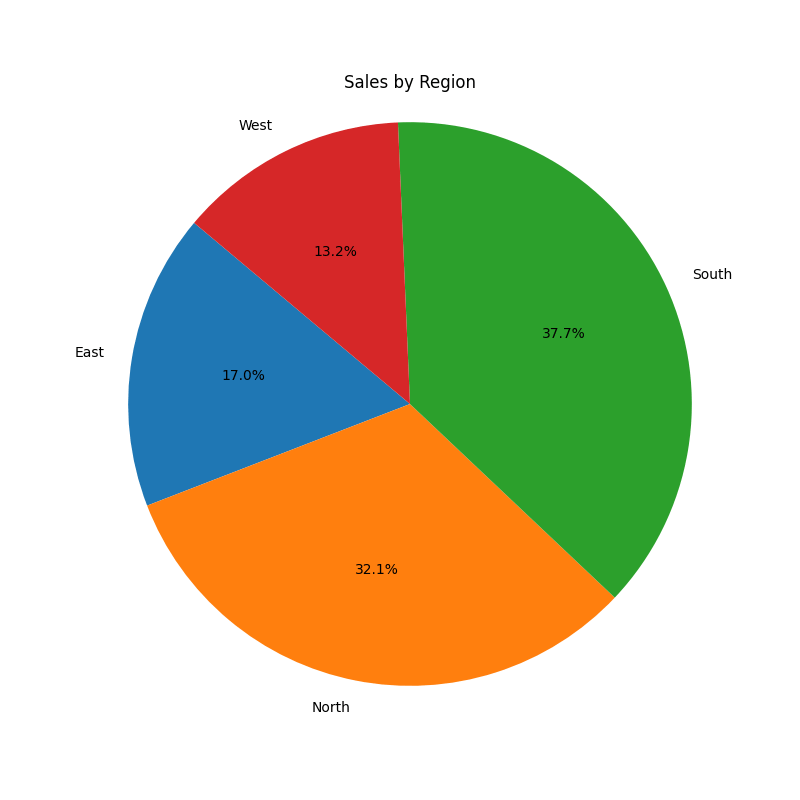
Create a code interpreter agent for data analysis and invoke it with a fictitiousdata.csv data file.
Before running this sample, create a local data.csv file in your current
working directory.
Example: using image generation tool
Before running this example, confirm that your project has a deployment namedgpt-image-1.5. The following example shows how to use ImageGenTool for image
generation:

Using other built-in tools
Any Foundry Agent Service tool can be used withcreate_prompt_agent. Use AgentServiceBaseTool
to wrap tools from the Azure AI Projects SDK and attach them to your prompt agent.
Before running this sample, make sure the vector store ID exists in your
project. Set the ID as an environment variable:
FileSearchTool:
Human-in-the-loop
Certain tools in Foundry have built-in approval workflows, likeMCPTool. You can
require approval before tool calls execute for a given tool in the server.
The method create_prompt_agent implements the same pattern recommended by LangGraph,
by introducing an approval node in the graph:
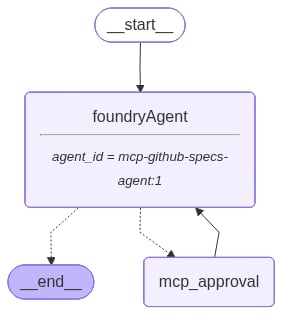
MCPTool with approval:
Command in LangGraph:
Observability
When you compose solutions using Foundry Agent Service and LangGraph, certain pieces run in the Agent Service while others run where your code executes. The classAzureAIOpenTelemetryTracer allows you to trace end-to-end
solutions
built with LangGraph using the OpenTelemetry standard, which is supported by
the Agent Service.
To trace your code, use:
AzureAIOpenTelemetryTracer
to send traces to Azure Application Insights using OpenTelemetry standard. It
sets the parameter agent_id to identify traces by setting the property
gen_ai.agent.id in spans of type agent_invoke. AzureAIOpenTelemetryTracer
requires a connection string to Azure Application Insights. In this case, it’s
not shown because you set the environment variable
AZURE_AI_PROJECT_ENDPOINT, which the class can use to detect the connection
string to the Azure Application Insights associated with the project. You can
pass any connection string you need.
To view the traces, it’s important to understand that there are two agents here:
- The Foundry agent, which is the backend of one of the nodes of the graph.
- The entire LangGraph graph, which is composed as the multiple nodes.
- Go to the Azure portal.
- Navigate to the Azure Application Insights you configured.
- Using the left navigation bar, select Investigate > Agents (Preview).
- You see a dashboard showing agents, models, and tools executions. Use this view to understand the general picture of your agents.
- Select View Traces with Agent Runs. The side panel shows all the traces generated by agent runs.
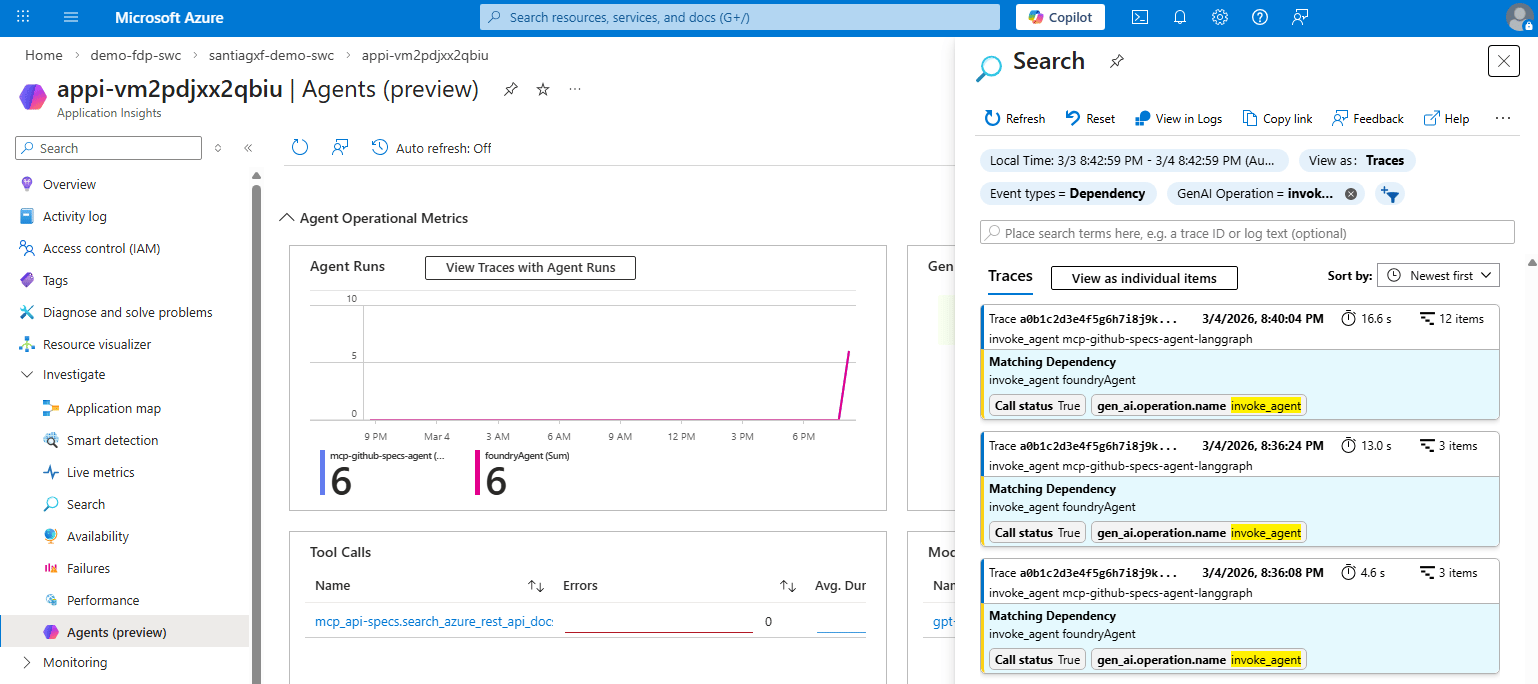
- Select one of the traces. You should see the details.
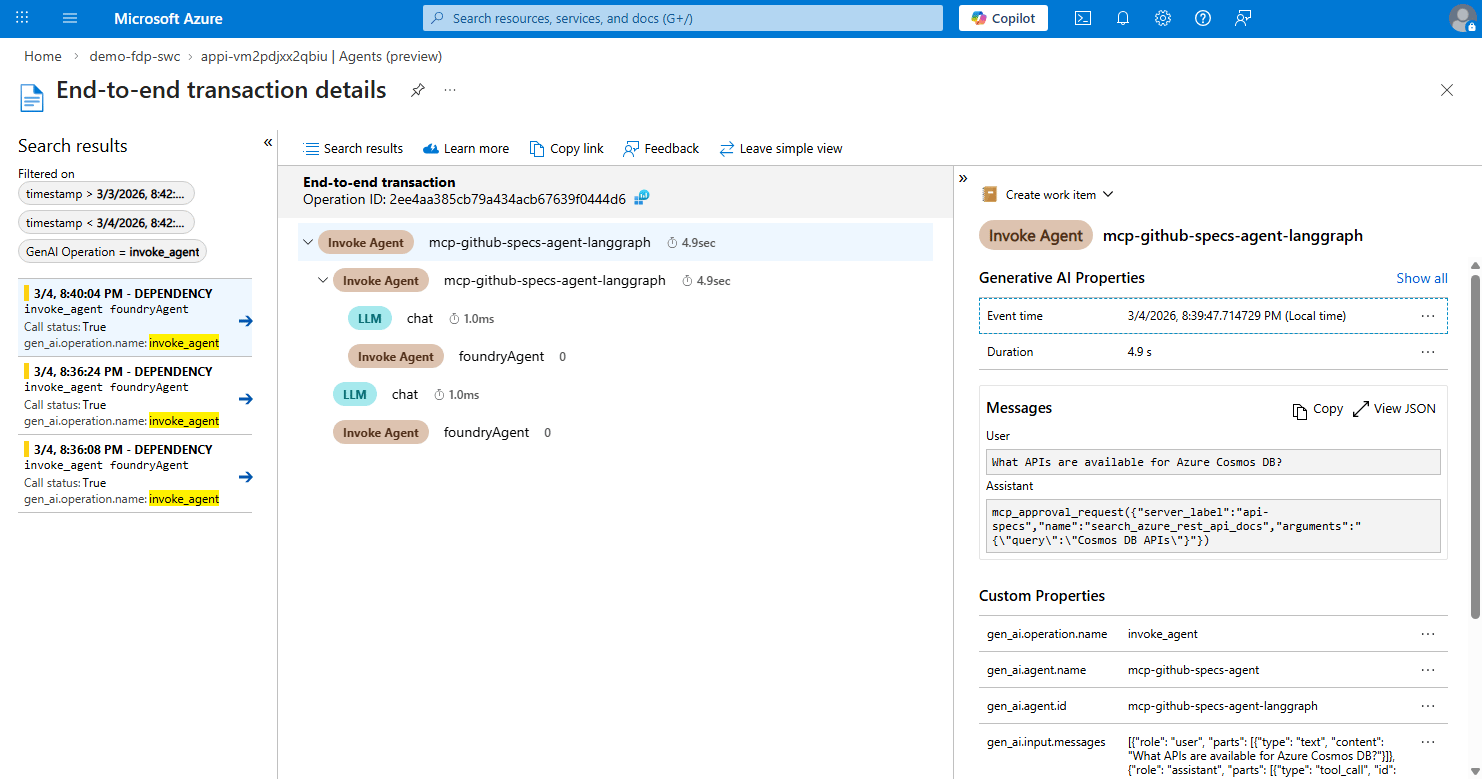
- Notice how two agents are involved in the conversation: the agent
foundryAgentand the one namedmcp-github-specs-agent-langgraph.
Clean up agents
Delete agents you created in samples to avoid leaving unused resources. Delete only agents that you created in your session.After deletion, the LangGraph object can no longer be used.
Troubleshooting
Use this checklist to diagnose common problems when usinglangchain-azure-ai
with Agent Service.
Enable diagnostic logging
Turn on debug logs first so you can inspect authentication, request flow, and tool execution details.Validate configuration early
- Confirm
AZURE_AI_PROJECT_ENDPOINTpoints to the correct project endpoint and you are using a Foundry project with the new experience. - Confirm
MODEL_DEPLOYMENT_NAMEmatches an existing deployed model. - Verify authentication context with
az account show. - Use a minimal
create_prompt_agentexample first.
Verify resource and permission access
- Ensure your account has access to the Foundry project and model deployment.
- Ensure downstream dependencies (for example, vector stores or tool resources) exist and are reachable.
- If a tool requires a specific resource type, verify that resource is provisioned in the correct subscription and region.
Resolve tool execution errors
- If Code Interpreter returns a
400response, retry the request. If the error continues, confirm that the project region and chat model support Code Interpreter. - If image generation returns
DeploymentNotFound, deploygpt-image-1.5in the project or updatemodel_deploymentto the name of an existing image model deployment. - If an MCP request doesn’t pause for approval, make the prompt explicitly require use of the MCP tool. Approval occurs only when the model selects the tool.