If you want to use a private virtual network with the Azure AI Search tool, make sure you use Microsoft Entra project managed identity to authenticate in your Azure AI Search connection. Key-based authentication isn’t supported with private virtual networking.
Usage support
The following table shows SDK and setup support.Prerequisites
Estimated setup time: 15-30 minutes if you have an existing search index- A basic or standard agent environment.
- Install the SDK package for your preferred language. See the quickstart for details.
- Python:
pip install "azure-ai-projects>=2.0.0" - C#: Install the
Azure.AI.ProjectsNuGet package - JavaScript/TypeScript:
npm install @azure/ai-projects - Java: Add the
com.azure:azure-ai-agents:2.0.0dependency to yourpom.xml
- Python:
- An Azure subscription and Microsoft Foundry project with:
- Project endpoint
- Model deployment name
- Authentication configured (for example,
DefaultAzureCredential)
- An Azure AI Search index configured for vector search with:
- One or more
Edm.Stringfields that are searchable and retrievable - One or more
Collection(Edm.Single)vector fields that are searchable - At least one retrievable text field that contains the content you want the agent to cite
- A retrievable field that contains a source URL (and optionally a title) so citations can include a link
- One or more
- A connection between your Foundry project and your Azure AI Search service (see Setup).
- For keyless authentication, assign the following Azure role-based access control (RBAC) roles to your project’s managed identity:
- Search Index Data Contributor
- Search Service Contributor
Configure tool parameters
Code example
- You need the latest SDK package. For more information, see the quickstart.
- If you’re using the REST sample, the connection ID is in the format
/subscriptions/{{subscriptionId}}/resourceGroups/{{resourceGroupName}}/providers/Microsoft.CognitiveServices/accounts/{{foundryAccountName}}/projects/{{foundryProjectName}}/connections/{{connectionName}}. - If you’re using the Python, C#, or TypeScript sample, you can provide the connection name and retrieve the connection ID with the SDK.
Limitations
Keep these constraints in mind when using the Azure AI Search tool:- A Foundry resource with basic agent deployments does not support private Azure AI Search resources, nor Azure AI Search with public network access disabled and a private endpoint. To use a private Azure AI Search tool with your agents, deploy the standard agent with virtual network injection.
- Private virtual network access: If you use a private virtual network with the Azure AI Search tool, you must use Microsoft Entra project managed identity (keyless authentication) in your Azure AI Search connection. Key-based authentication isn’t supported with private virtual networking. If you disabled public network access on your Azure AI Search resource, configure the connection to use managed identity instead of an API key.
- The Azure AI Search tool can only target one index.
- Your Azure AI Search resource and your Microsoft Foundry Agent must be in the same tenant.
Verify results
After you run a sample, validate that the agent is grounding responses from your index.- Ask a question that you know is answered in a specific indexed document.
- Confirm the response includes citations formatted as
[message_idx:search_idx†source]. - If you’re streaming, confirm you see
url_citationannotations in the response with valid URLs. - Verify the cited content matches your source documents in the search index.
Setup
In this section, you create a connection between the Microsoft Foundry project that contains your agent and the Azure AI Search service that contains your index. If you already connected your project to your search service, skip this section. To create the connection, you need your search service endpoint and authentication method. The following steps guide you through gathering these details.Gather connection details
Before creating a project connection, gather your Azure AI Search service endpoint and authentication credentials. The project connection requires the endpoint of your search service and either key-based authentication or keyless authentication with Microsoft Entra ID. For keyless authentication, you must enable role-based access control (RBAC) and assign roles to your project’s managed identity. Although this method involves extra steps, it enhances security by eliminating the need for hard-coded API keys. Select the tab for your desired authentication method.- Key-based authentication
- Keyless authentication
- Sign in to the Azure portal and select your search service.
- To get the endpoint:
- From the left pane, select Overview.
- Make a note of the URL, which should look like
https://my-service.search.windows.net.
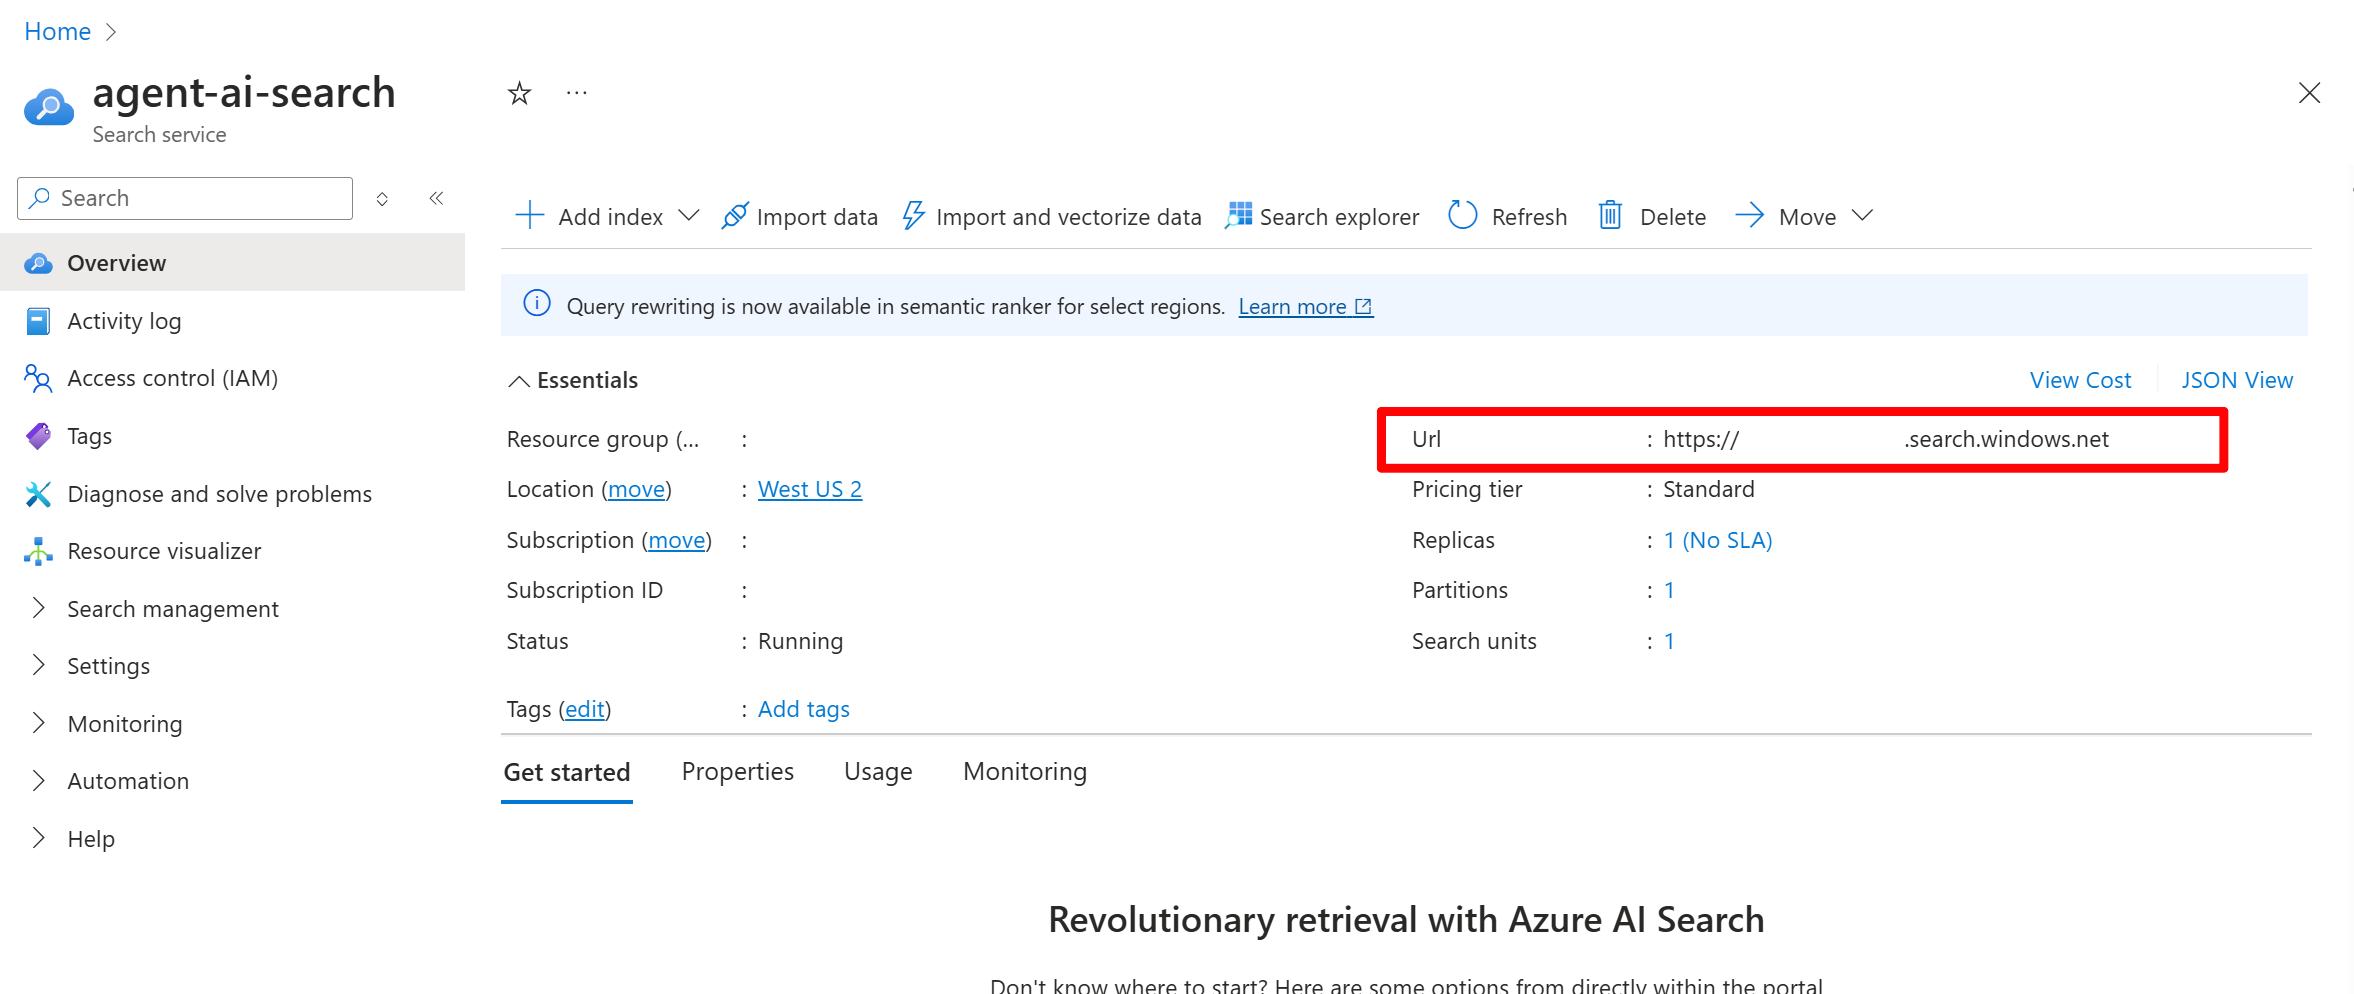
- To get the API key:
- From the left pane, select Settings > Keys.
- Select Both to enable both key-based and keyless authentication, which is recommended for most scenarios.
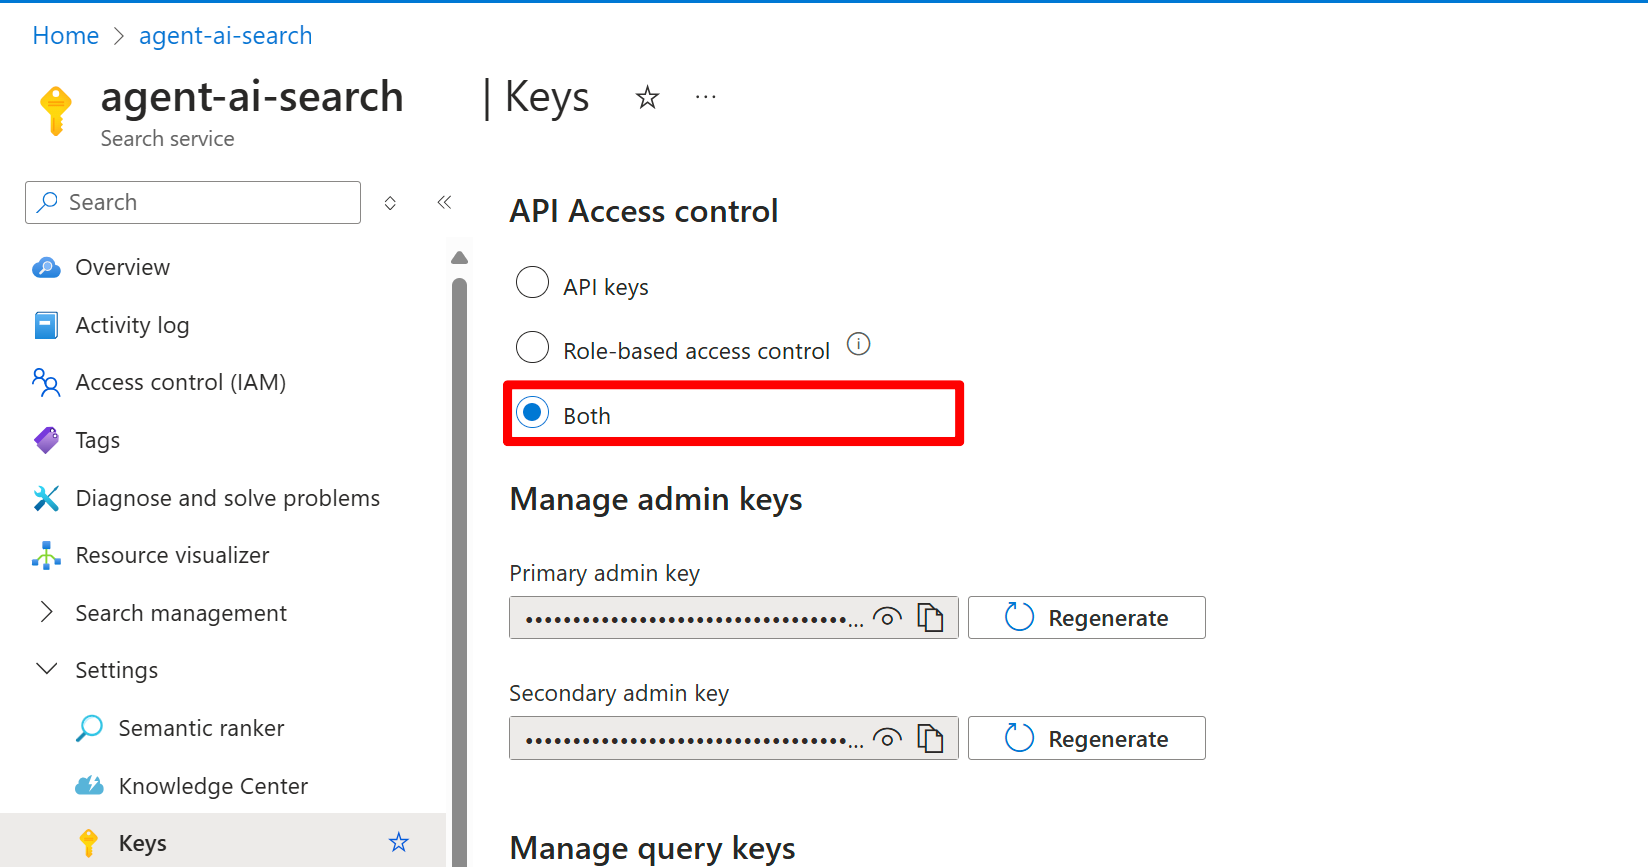
- Make a note of one of the keys under Manage admin keys.
Create a project connection
Create the project connection by using the search service details you gathered. Use one of the following options.- Foundry portal
- Azure CLI
- Python SDK
- REST API
- Bicep
- Go to the Foundry portal.
- Open your project, then select Operate > Admin.
- Select your project name in the Manage all projects list.
- Select Add connection.
- Select Azure AI Search from the list of available services.
- Browse for and select your Azure AI Search service, then select the type of Authentication to use.
- Select Add connection.