> ## Documentation Index
> Fetch the complete documentation index at: https://hobbyist-e43fa225.mintlify.site/llms.txt
> Use this file to discover all available pages before exploring further.
# Quickstart: Multi-turn conversational language understanding (CLU) models with entity slot filling
> Create a multi-turn conversational language understanding (CLU) model with entity slot filling in Microsoft Foundry (classic).
In this article, get started building a CLU model that uses entity slot filling to enable multi-turn conversations. This approach allows your model to collect information progressively across multiple conversation turns, rather than requiring users to provide all details in a single interaction to complete tasks naturally and efficiently.
If you don't have an Azure subscription, [create a free account](https://azure.microsoft.com/pricing/purchase-options/azure-account?cid=msft_learn) before you begin.
Multi-turn entity slot filling is available only in Microsoft Foundry (classic). This quickstart uses the classic portal at [https://ai.azure.com/](https://ai.azure.com/). For more information about the portals, see [What is Microsoft Foundry?](https://learn.microsoft.com/en-us/azure/ai-foundry/what-is-foundry).
Deploying and using models can incur costs in your Azure subscription.
## Prerequisites
* **Azure subscription** - If you don't have one, you can [create one for free](https://azure.microsoft.com/pricing/purchase-options/azure-account?cid=msft_learn).
* **Required permissions** - Ensure that the person establishing the account and project has the Foundry Account Owner role at the subscription level. Alternatively, the **Contributor** or **Cognitive Services Contributor** role at the subscription scope also meets this requirement. For more information, see [Language role-based access control](../../concepts/role-based-access-control) and [Assign Azure roles](https://learn.microsoft.com/azure/role-based-access-control/role-assignments-steps).
> The Foundry RBAC roles were recently renamed. **Foundry User**, **Foundry Owner**, **Foundry Account Owner**, and **Foundry Project Manager** were previously named Azure AI User, Azure AI Owner, Azure AI Account Owner, and Azure AI Project Manager. You might still see the previous names in some places while the rename rolls out. The role IDs and core permissions are unchanged by the rename.
* **Azure Language in Foundry Tools resource** - Create a [Language resource](https://portal.azure.com/?Microsoft_Azure_PIMCommon=true#create/Microsoft.CognitiveServicesTextAnalytics) in the Azure portal.
You need the **owner** role assigned on the **resource group** to create a Language resource.
* **Microsoft Foundry project** - Create a project in Foundry. For more information, see [Create a Foundry project](https://learn.microsoft.com/en-us/azure/ai-foundry/how-to/create-projects).
* **Deployed OpenAI model** - Deploy an OpenAI model in Foundry as described in the [Deploy an OpenAI model](#deploy-an-openai-model-in-foundry-portal) section.
## Configure roles, permissions, and settings
Begin by configuring your Azure resources with the appropriate roles and permissions.
### Add roles for your Language resource
1. Navigate to your Language resource page in the [Azure portal](https://portal.azure.com/) and select **Access Control (IAM)** from the left navigation pane.
2. Select **Add** > **Add Role Assignments**, and assign either the **Cognitive Services Language Owner** or **Cognitive Services Contributor** role for your Language resource.
3. Under **Assign access to**, select **User, group, or service principal**.
4. Select **Select members**.
5. Choose your user name from the list. You can search for user names in the **Select** field. Repeat this step for all required roles.
6. Repeat these steps for all user accounts that require access to this resource.
## Connect Azure Language resource to Foundry
To enable secure access, create a connection between your Language resource and Foundry. This connection provides secure identity management, authentication, and controlled access to your data.
The multi-turn capability is currently only available in the Foundry (classic) portal.
For more information about connecting resources, see [How to use Foundry Tools in the Foundry portal](../../../connect-services-foundry-portal).
1. Navigate to [Foundry (classic)](https://ai.azure.com/).
2. Access your existing Foundry project for this tutorial.
3. Select **Management center** from the left navigation menu.
4. Select **Connected resources** from the **Hub** section of the **Management center** menu.
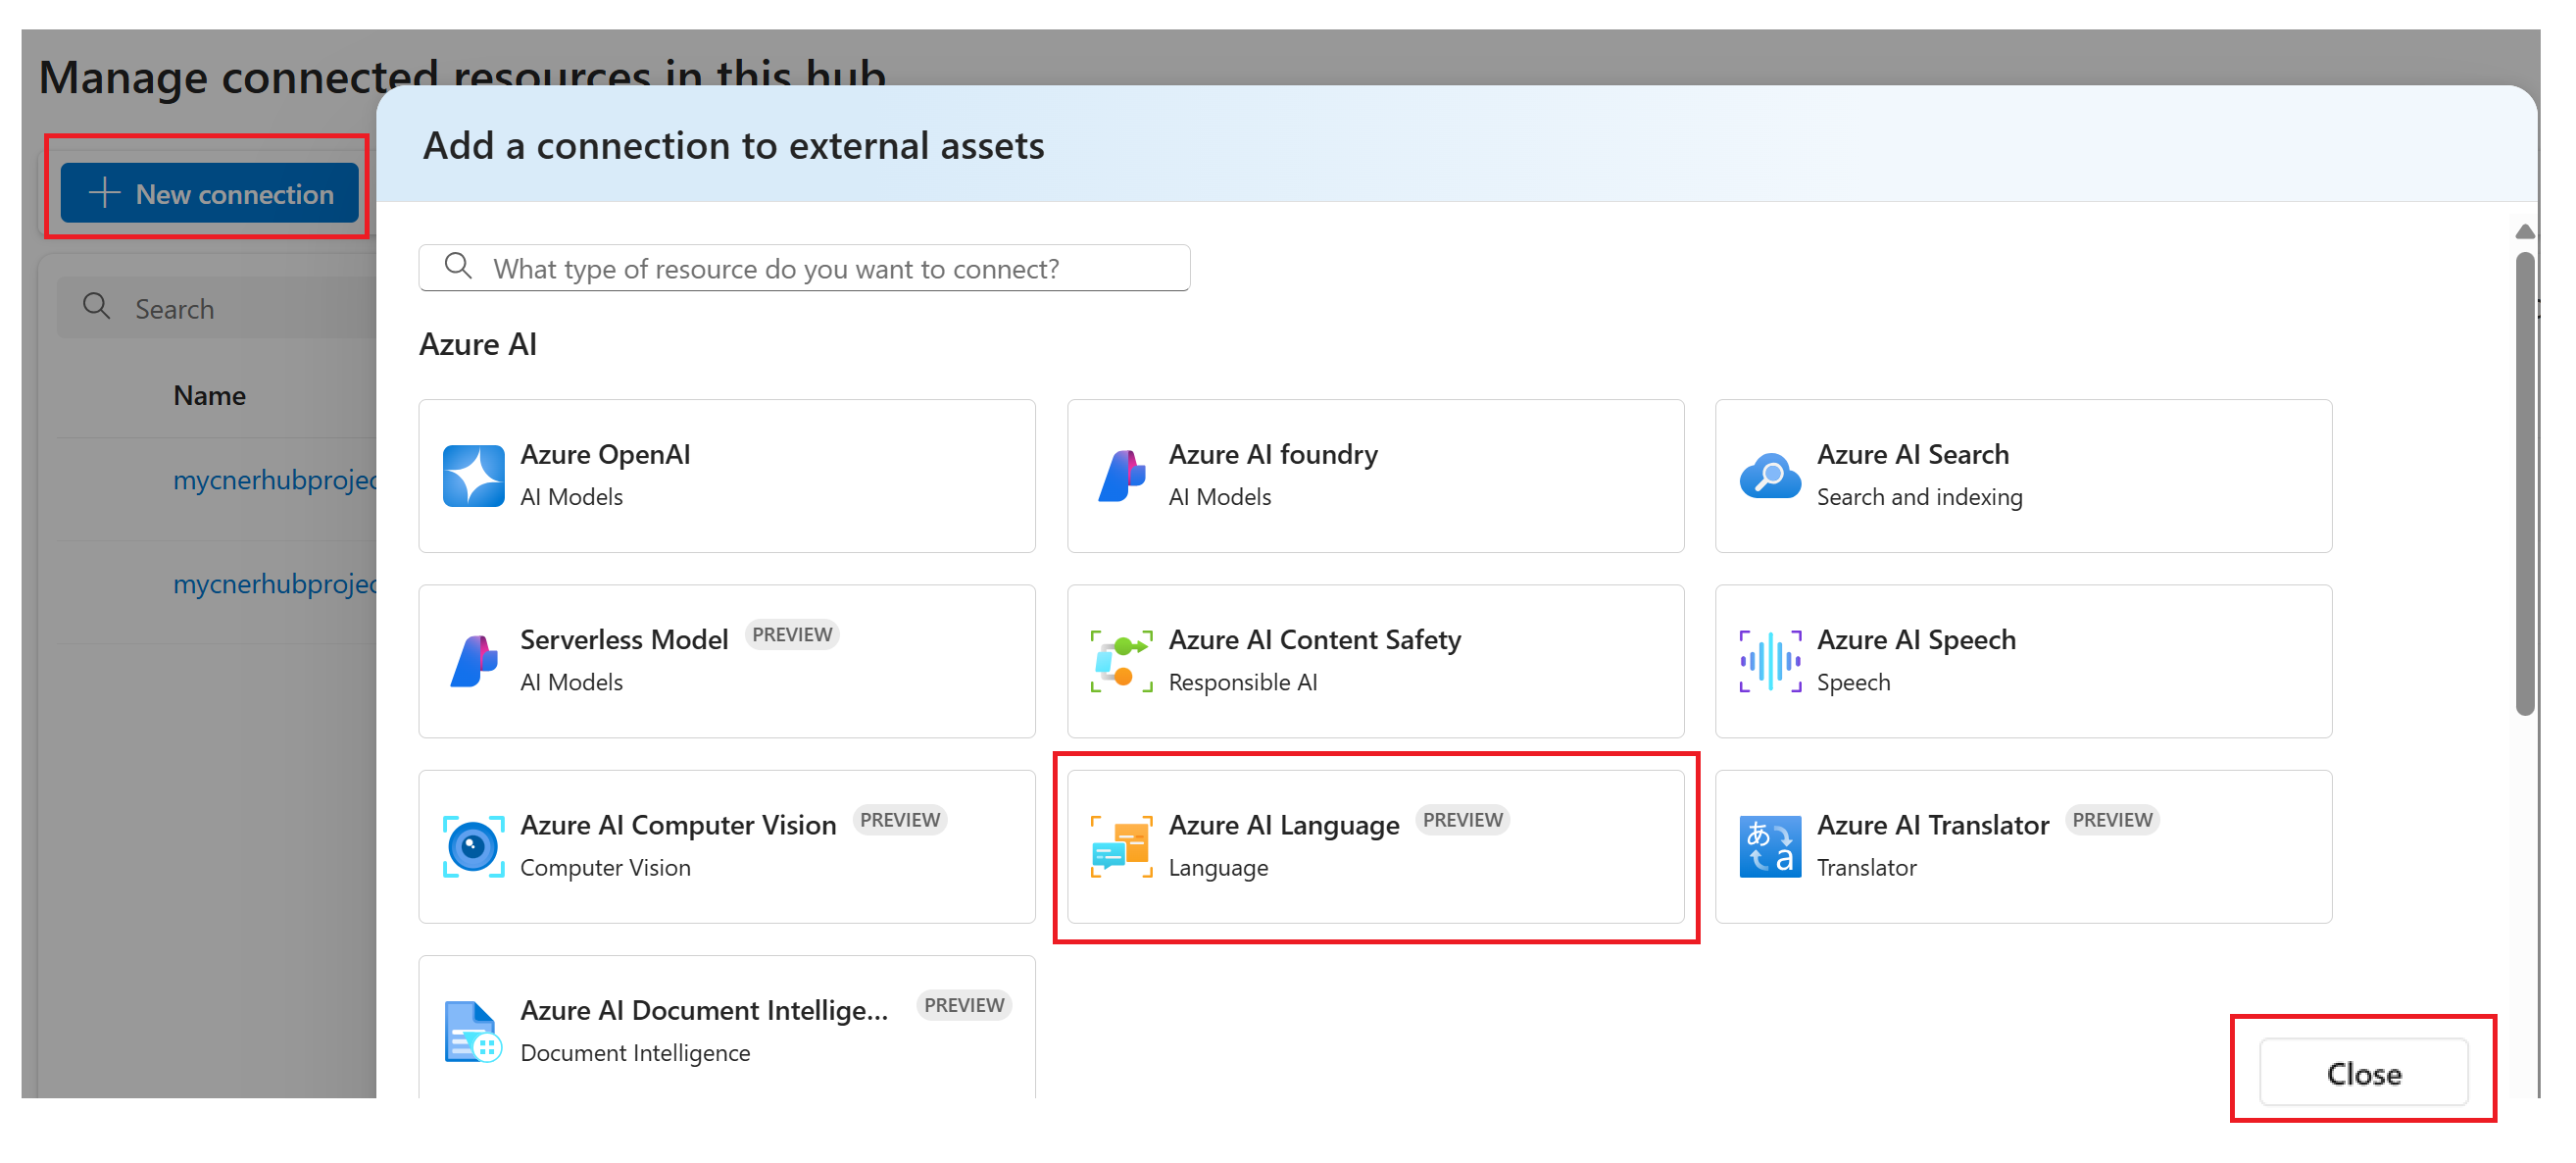
5. In the main window, select **+ New connection**.
6. Select **Language** from the **Add a connection to external assets** window.
7. Select **Add connection**, then select **Close**.
 ## Deploy an OpenAI model in Foundry portal
Deploy an OpenAI model to provide the foundational intelligence and advanced reasoning capabilities for your CLU model.
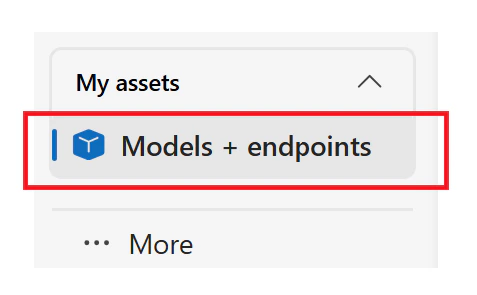
1. Select **Models + endpoints** from the **My assets** section of the navigation menu.
## Deploy an OpenAI model in Foundry portal
Deploy an OpenAI model to provide the foundational intelligence and advanced reasoning capabilities for your CLU model.
1. Select **Models + endpoints** from the **My assets** section of the navigation menu.
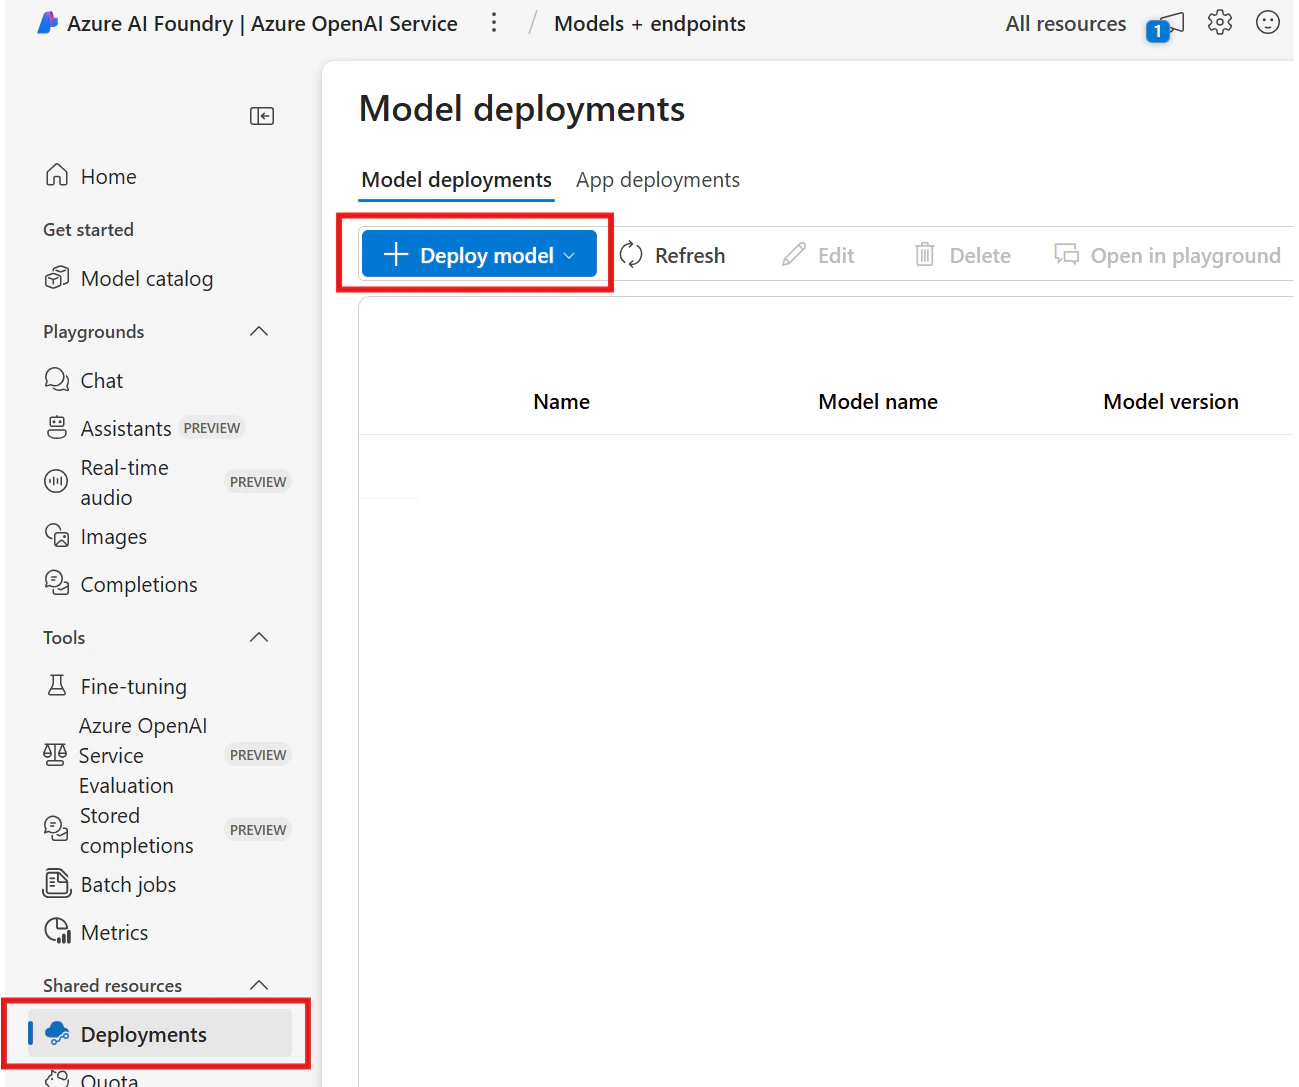
 1. From the main window, select **+ Deploy model**.
2. Select **Deploy base model** from the dropdown menu.
1. From the main window, select **+ Deploy model**.
2. Select **Deploy base model** from the dropdown menu.
 1. In the **Select a model** window, choose a model. The **gpt-4** base model is recommended for this project.
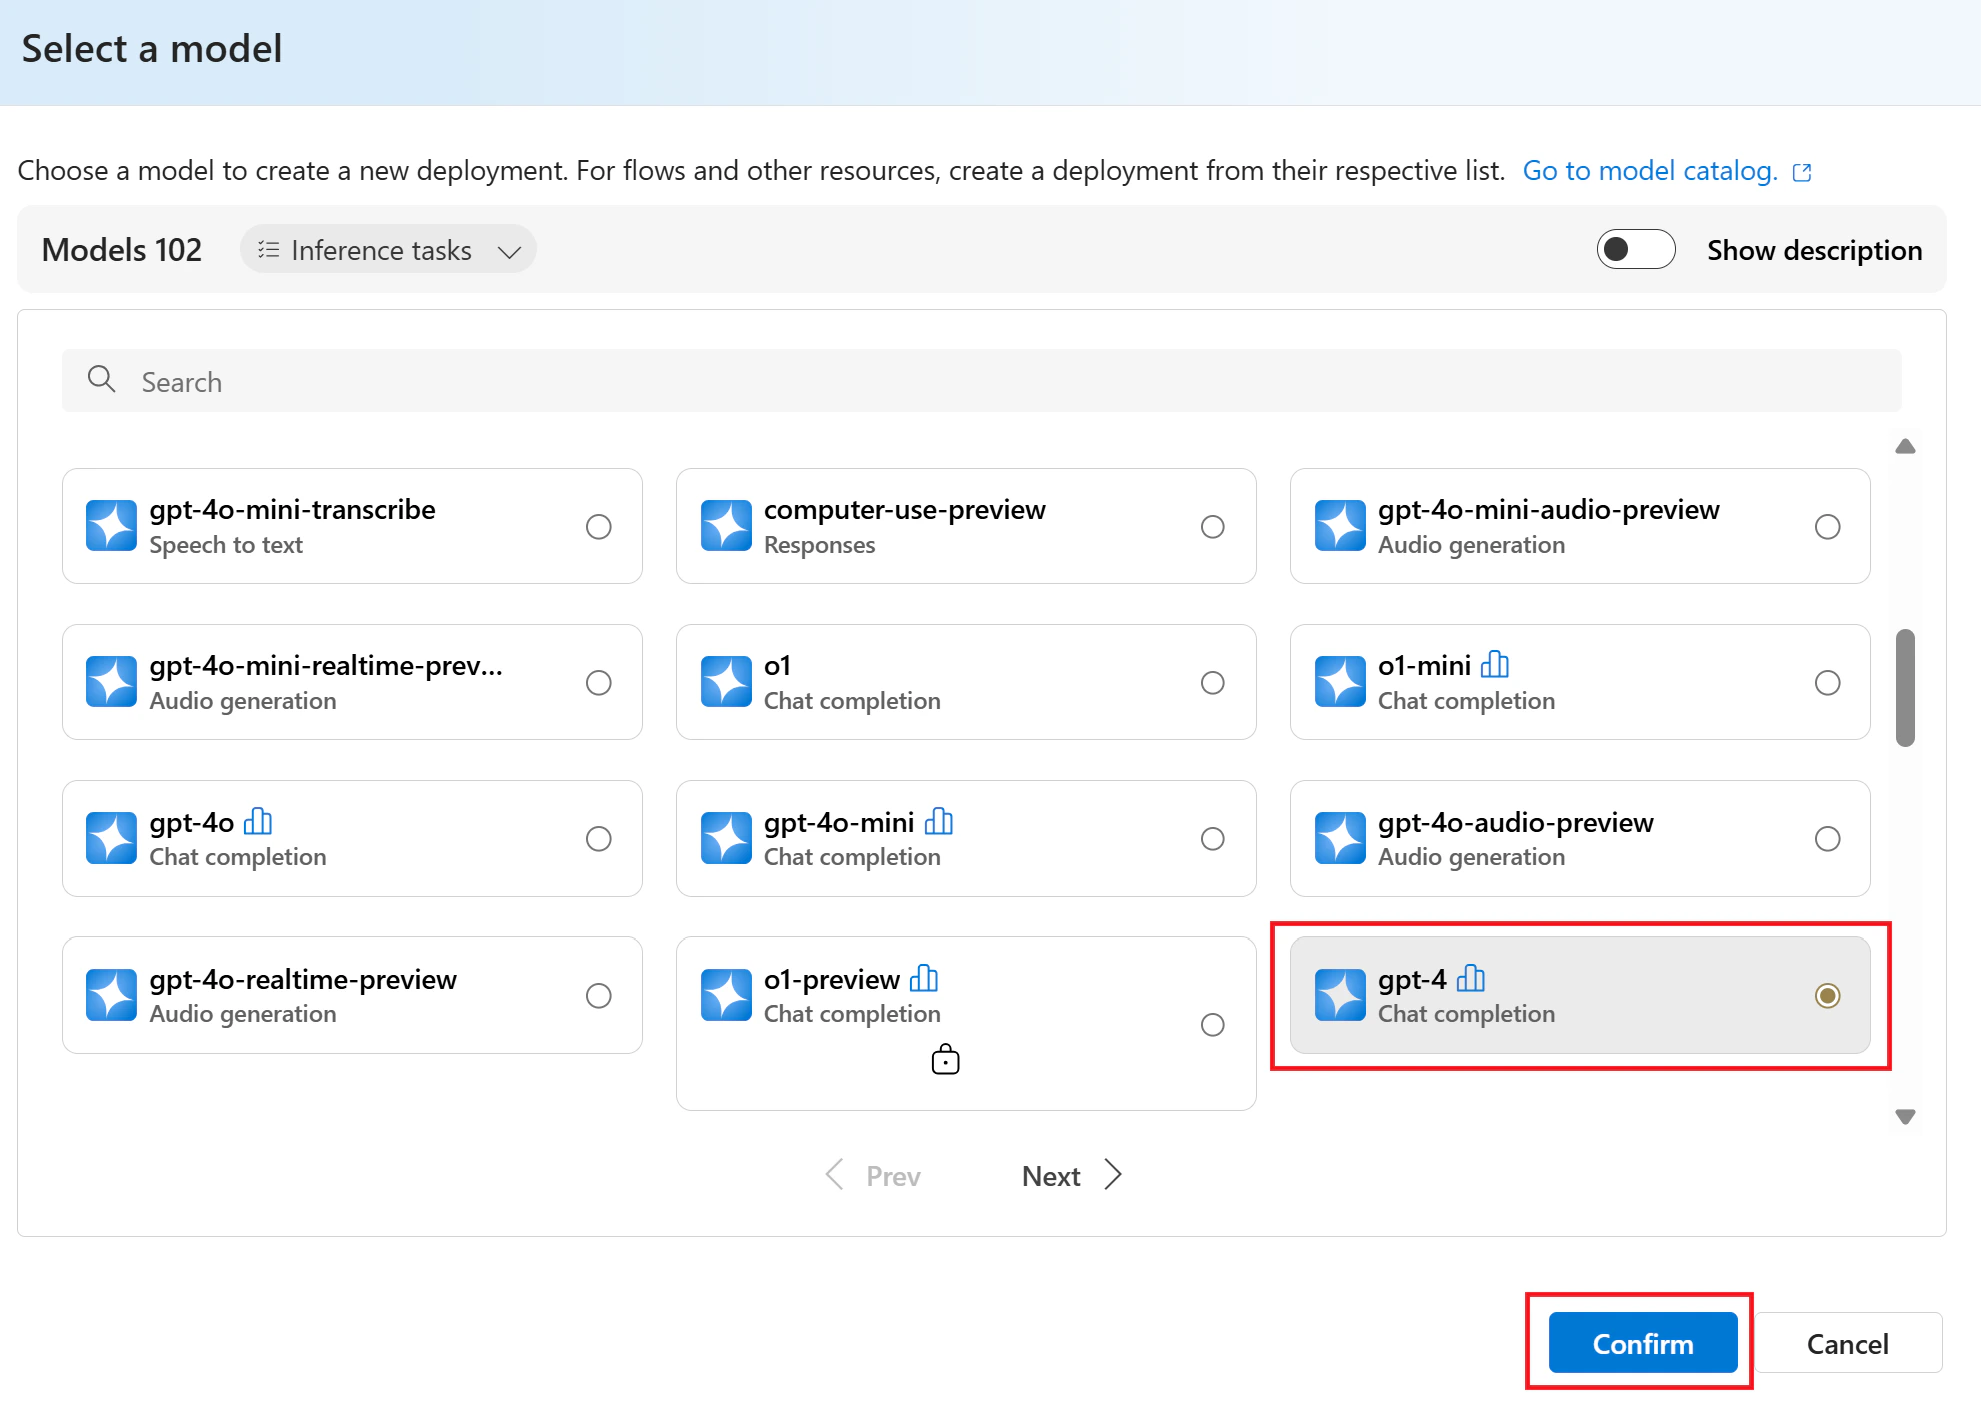 1. Select **Confirm**.
2. In the **Deploy gpt-4** window, retain the default values and select **Deploy**.
1. Select **Confirm**.
2. In the **Deploy gpt-4** window, retain the default values and select **Deploy**.
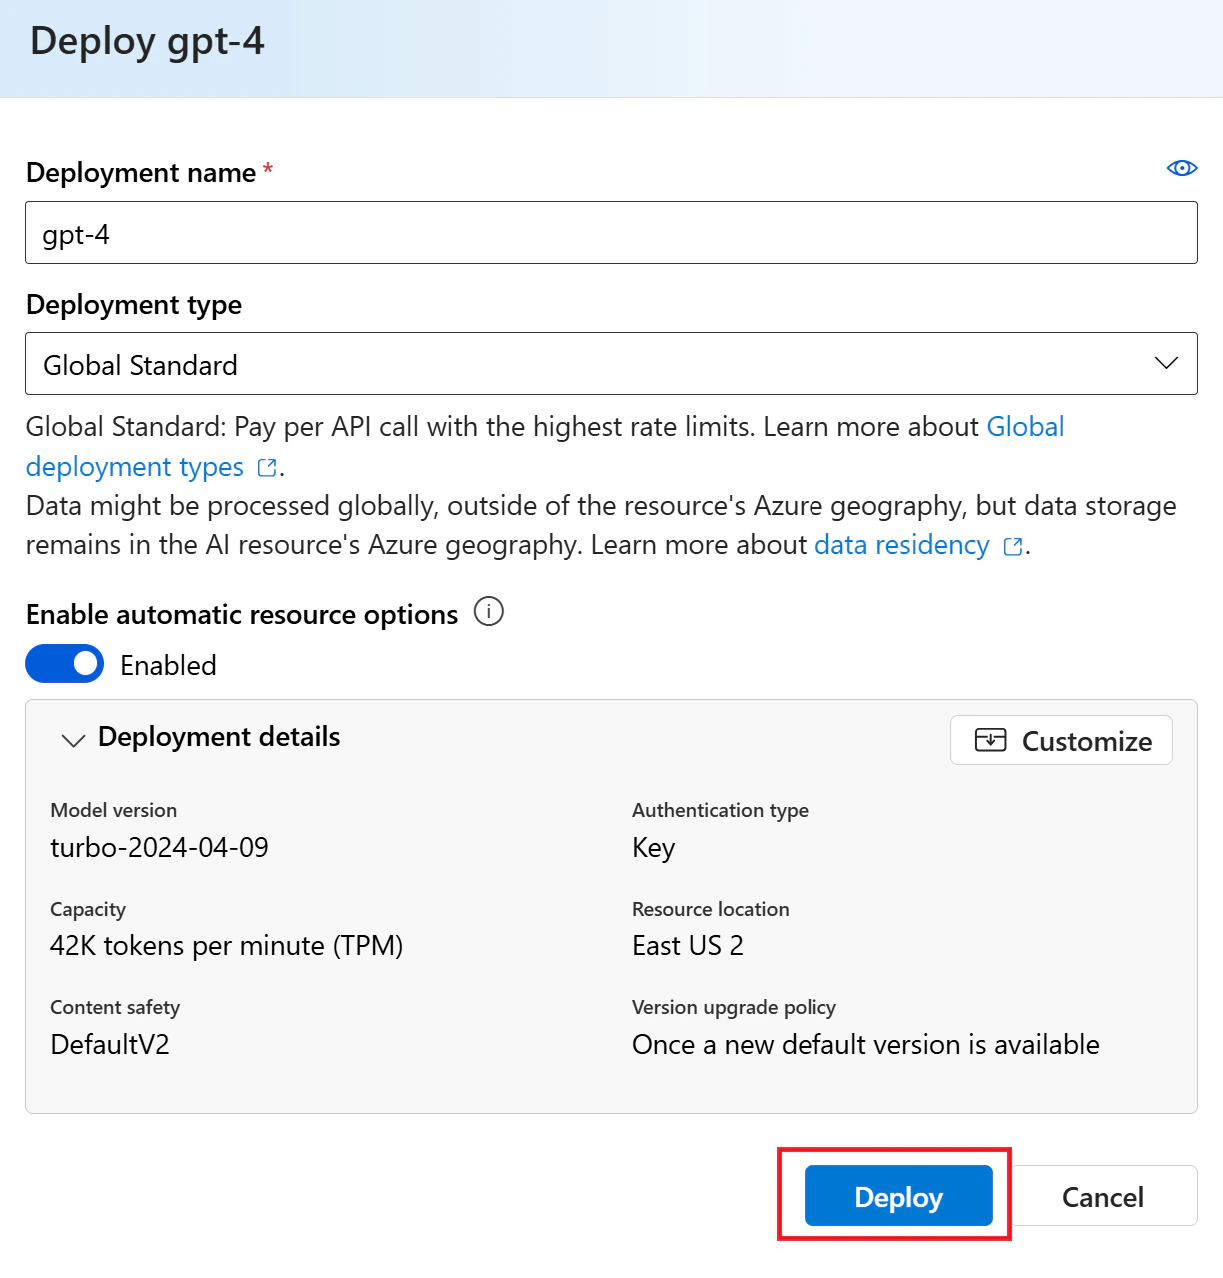 1. The model deployment is now complete.
## Verify your setup
Before you start building your multi-turn model, verify the dependencies for this quickstart:
* Your Language resource appears under **Management center** > **Connected resources**.
* Your OpenAI deployment appears under **Models + endpoints**.
* You can open your Foundry project in Microsoft Foundry (classic).
## Build a multi-turn model
Now that your Language resource, Foundry project, and OpenAI deployment are configured, you're ready to build your CLU model.
### Create your CLU project
In this section, you create a travel agent model and deploy it using Quick Deploy.
1. Navigate to [Foundry (classic)](https://ai.azure.com).
2. If you aren't already signed in, the portal prompts you to authenticate with your Azure credentials.
3. Once signed in, create or access your existing projects within Foundry.
4. If you're not already in your project for this task, select it.
5. In the left navigation pane **Overview** section, select **Fine-tuning**.
6. From the main window, select the **AI Service fine-tuning** tab, then select **+ Fine-tune**.
7. In the **Create service fine-tuning** window, choose the **Conversational language understanding** tab, then select **Next**.
8. In the **Create CLU fine-tuning task** window, complete the following fields:
* **Connected service** - The name of your language service resource should appear by default. If not, select it from the dropdown menu.
* **Name** - Provide a name for your fine-tuning task project.
* **Language** - English is set as the default and should already appear in the field.
* **Description** - Optionally provide a description or leave this field empty.
9. Select **Create**. The creation operation might take a few minutes to complete. After it finishes, your new CLU project appears in the **AI Service fine-tuning** list.
### Add your intents
1. From the **Getting Started** menu, select **Define schema**.
2. In the main window, select **Add Intent**.
3. The **Add Intent** window contains two required fields:
* Intent name (Pascal case)
* Intent description (required for Quick Deploy)
4. After completing these fields, select **+ Add** to create your intents.
5. Add the following intents:
| Intent name | Intent description |
| ------------ | ------------------------------------------------------------------ |
| BookFlight | Make a travel reservation for an airline flight. |
| FlightTime | The scheduled departure and/or arrival time for an airline flight. |
| FlightStatus | The current status of a scheduled flight. |
1. The model deployment is now complete.
## Verify your setup
Before you start building your multi-turn model, verify the dependencies for this quickstart:
* Your Language resource appears under **Management center** > **Connected resources**.
* Your OpenAI deployment appears under **Models + endpoints**.
* You can open your Foundry project in Microsoft Foundry (classic).
## Build a multi-turn model
Now that your Language resource, Foundry project, and OpenAI deployment are configured, you're ready to build your CLU model.
### Create your CLU project
In this section, you create a travel agent model and deploy it using Quick Deploy.
1. Navigate to [Foundry (classic)](https://ai.azure.com).
2. If you aren't already signed in, the portal prompts you to authenticate with your Azure credentials.
3. Once signed in, create or access your existing projects within Foundry.
4. If you're not already in your project for this task, select it.
5. In the left navigation pane **Overview** section, select **Fine-tuning**.
6. From the main window, select the **AI Service fine-tuning** tab, then select **+ Fine-tune**.
7. In the **Create service fine-tuning** window, choose the **Conversational language understanding** tab, then select **Next**.
8. In the **Create CLU fine-tuning task** window, complete the following fields:
* **Connected service** - The name of your language service resource should appear by default. If not, select it from the dropdown menu.
* **Name** - Provide a name for your fine-tuning task project.
* **Language** - English is set as the default and should already appear in the field.
* **Description** - Optionally provide a description or leave this field empty.
9. Select **Create**. The creation operation might take a few minutes to complete. After it finishes, your new CLU project appears in the **AI Service fine-tuning** list.
### Add your intents
1. From the **Getting Started** menu, select **Define schema**.
2. In the main window, select **Add Intent**.
3. The **Add Intent** window contains two required fields:
* Intent name (Pascal case)
* Intent description (required for Quick Deploy)
4. After completing these fields, select **+ Add** to create your intents.
5. Add the following intents:
| Intent name | Intent description |
| ------------ | ------------------------------------------------------------------ |
| BookFlight | Make a travel reservation for an airline flight. |
| FlightTime | The scheduled departure and/or arrival time for an airline flight. |
| FlightStatus | The current status of a scheduled flight. |
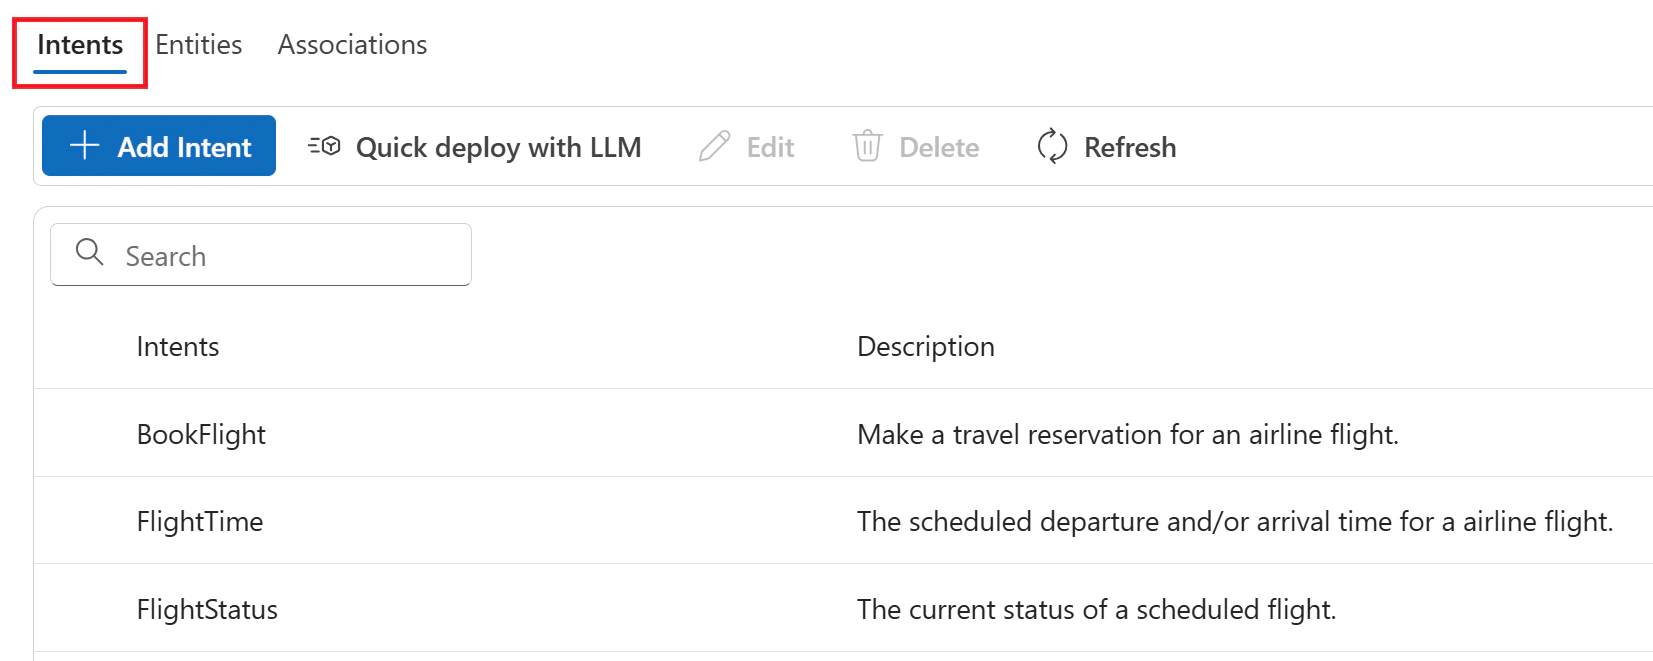 1. After defining all intents, select **Add Intent**.
### Add your entities
1. Select the **Entities** tab, then select **Add entity**.
2. The **Add an entity** window contains two required fields:
* Entity name (Pascal case)
* Entity description
3. After completing the entity fields, select **Add an entity**.
4. Add the following entities:
| Entity name | Entity description |
| ------------------- | ------------------------------------ |
| FlightNumber | Flight number for scheduled flight. |
| FlightDepartureTime | Departure time for scheduled flight. |
| TravelDate | Desired travel date. |
1. After defining all intents, select **Add Intent**.
### Add your entities
1. Select the **Entities** tab, then select **Add entity**.
2. The **Add an entity** window contains two required fields:
* Entity name (Pascal case)
* Entity description
3. After completing the entity fields, select **Add an entity**.
4. Add the following entities:
| Entity name | Entity description |
| ------------------- | ------------------------------------ |
| FlightNumber | Flight number for scheduled flight. |
| FlightDepartureTime | Departure time for scheduled flight. |
| TravelDate | Desired travel date. |
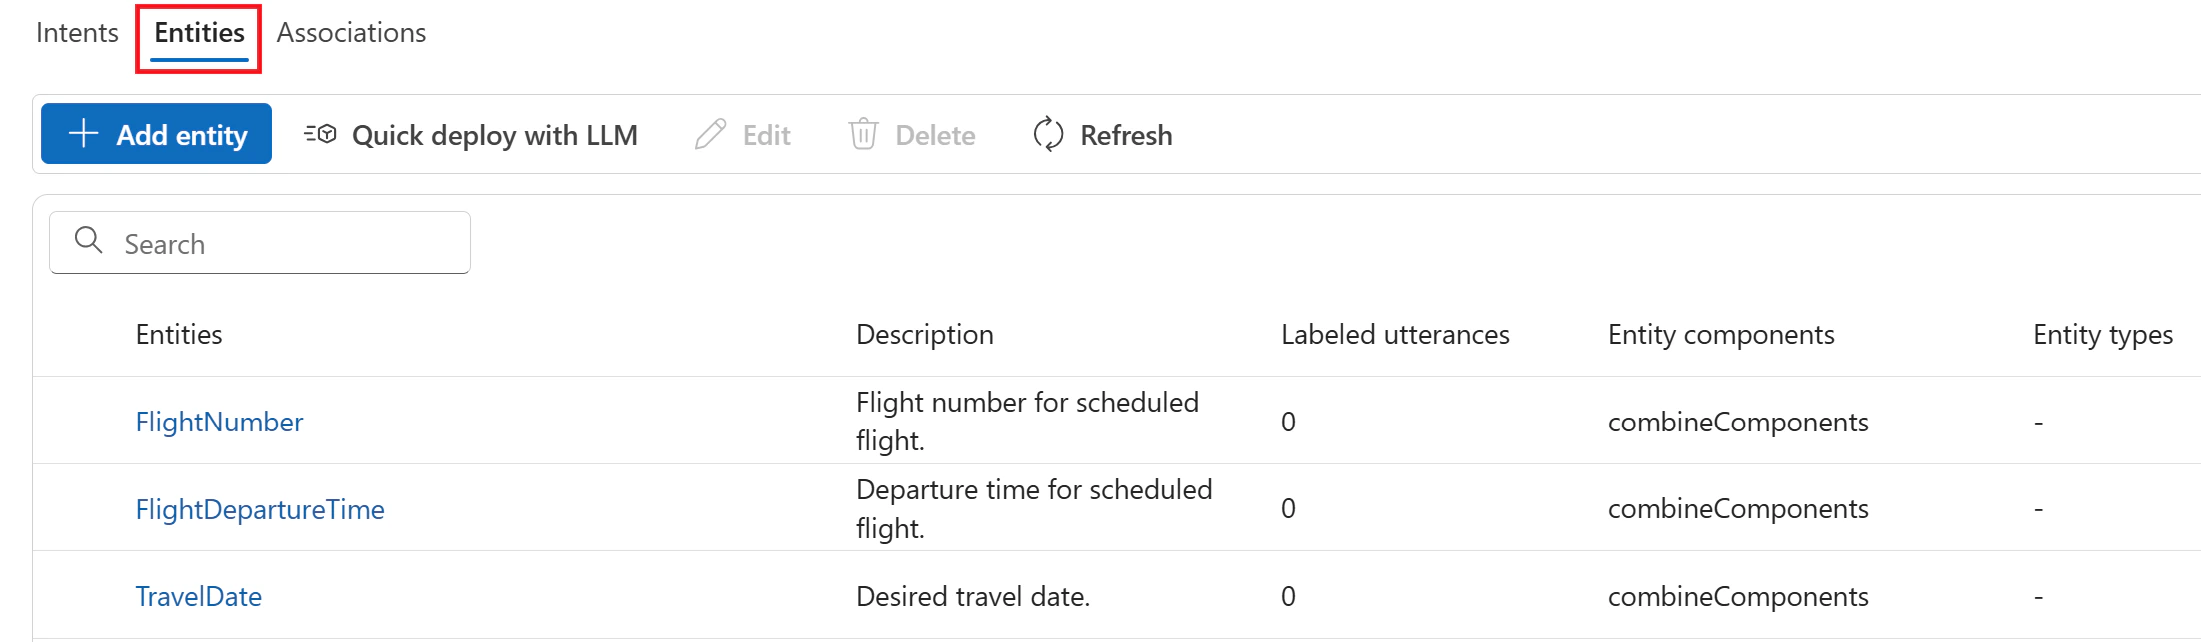 1. For common data types, add prebuilt entity components:
* Select your **TravelDate** entity:
* Under the **Prebuilt** section, select **Add prebuilt**.
* Select **DateTime** from the dropdown list, then select **Add**.
* Select your **FlightDepartureTime** entity:
* Under the **Prebuilt** section, select **Add prebuilt**.
* Select **DateTime** from the dropdown list, then select **Add**.
1. For common data types, add prebuilt entity components:
* Select your **TravelDate** entity:
* Under the **Prebuilt** section, select **Add prebuilt**.
* Select **DateTime** from the dropdown list, then select **Add**.
* Select your **FlightDepartureTime** entity:
* Under the **Prebuilt** section, select **Add prebuilt**.
* Select **DateTime** from the dropdown list, then select **Add**.
 ### Associate your intents with entities
1. Select the **Associations** tab.
2. Select each intent and link it to the required entities from the **Available entities** section. This step ensures the model knows which slots to fill for each intent.
3. All entities must have an association with at least one intent. After configuring the associations, select **Update associations**.
| Intent | Association |
| ------------ | --------------------------------------------- |
| BookFlight | TravelDate |
| FlightTime | FlightDepartureTime, TravelDate |
| FlightStatus | FlightNumber, FlightDepartureTime, TravelDate |
Now that all entities have associations, you can proceed with Quick Deploy using a large language model (LLM).
### Use Quick deploy with LLM
1. From the **Getting Started** menu, select **Train model**.
2. In the **Train your model** section, select **Quick deploy with LLM**.
3. Complete the **Quick deploy with LLM** window fields:
* **Deployment name** - Provide a name for the deployment.
* **Select Azure OpenAI Model Deployment** - Choose the Azure OpenAI model deployment you created for this project.
* **Deployment regions** - Select the region associated with your Azure Language resource.
4. Select **Create**. Foundry manages the configuration and deployment processes through backend operations.
After deployment completes, your CLU project has a deployment you can select in the playground.
### Test your model in the playground
1. From the **Getting Started** menu, select **Deploy your model**.
2. In the main window, select your model.
3. Select **Try in playground**.
4. In the playground, select the **Conversational language understanding** tile.
5. Under the **Configuration** menu on the left, verify that the following fields are completed correctly:
* **Project name** - Ensure this matches the project you created for this CLU fine-tuning task.
* **Deployment name** - Verify this matches the name you assigned to your OpenAI model.
6. Select the **Multi-turn** understanding checkbox.
7. Simulate a multi-turn dialog by entering the following conversation:
```text theme={null}
User: Hello, I would like to book a flight.
Agent: Hello! On which day do you intend to travel?
User: Tomorrow.
Agent: What departure time would you prefer for your flight?
User: Anytime after 5:00 PM.
```
8. Select **Run**.
9. The model returns a response in both **Text** and **JSON** formats.
### Associate your intents with entities
1. Select the **Associations** tab.
2. Select each intent and link it to the required entities from the **Available entities** section. This step ensures the model knows which slots to fill for each intent.
3. All entities must have an association with at least one intent. After configuring the associations, select **Update associations**.
| Intent | Association |
| ------------ | --------------------------------------------- |
| BookFlight | TravelDate |
| FlightTime | FlightDepartureTime, TravelDate |
| FlightStatus | FlightNumber, FlightDepartureTime, TravelDate |
Now that all entities have associations, you can proceed with Quick Deploy using a large language model (LLM).
### Use Quick deploy with LLM
1. From the **Getting Started** menu, select **Train model**.
2. In the **Train your model** section, select **Quick deploy with LLM**.
3. Complete the **Quick deploy with LLM** window fields:
* **Deployment name** - Provide a name for the deployment.
* **Select Azure OpenAI Model Deployment** - Choose the Azure OpenAI model deployment you created for this project.
* **Deployment regions** - Select the region associated with your Azure Language resource.
4. Select **Create**. Foundry manages the configuration and deployment processes through backend operations.
After deployment completes, your CLU project has a deployment you can select in the playground.
### Test your model in the playground
1. From the **Getting Started** menu, select **Deploy your model**.
2. In the main window, select your model.
3. Select **Try in playground**.
4. In the playground, select the **Conversational language understanding** tile.
5. Under the **Configuration** menu on the left, verify that the following fields are completed correctly:
* **Project name** - Ensure this matches the project you created for this CLU fine-tuning task.
* **Deployment name** - Verify this matches the name you assigned to your OpenAI model.
6. Select the **Multi-turn** understanding checkbox.
7. Simulate a multi-turn dialog by entering the following conversation:
```text theme={null}
User: Hello, I would like to book a flight.
Agent: Hello! On which day do you intend to travel?
User: Tomorrow.
Agent: What departure time would you prefer for your flight?
User: Anytime after 5:00 PM.
```
8. Select **Run**.
9. The model returns a response in both **Text** and **JSON** formats.
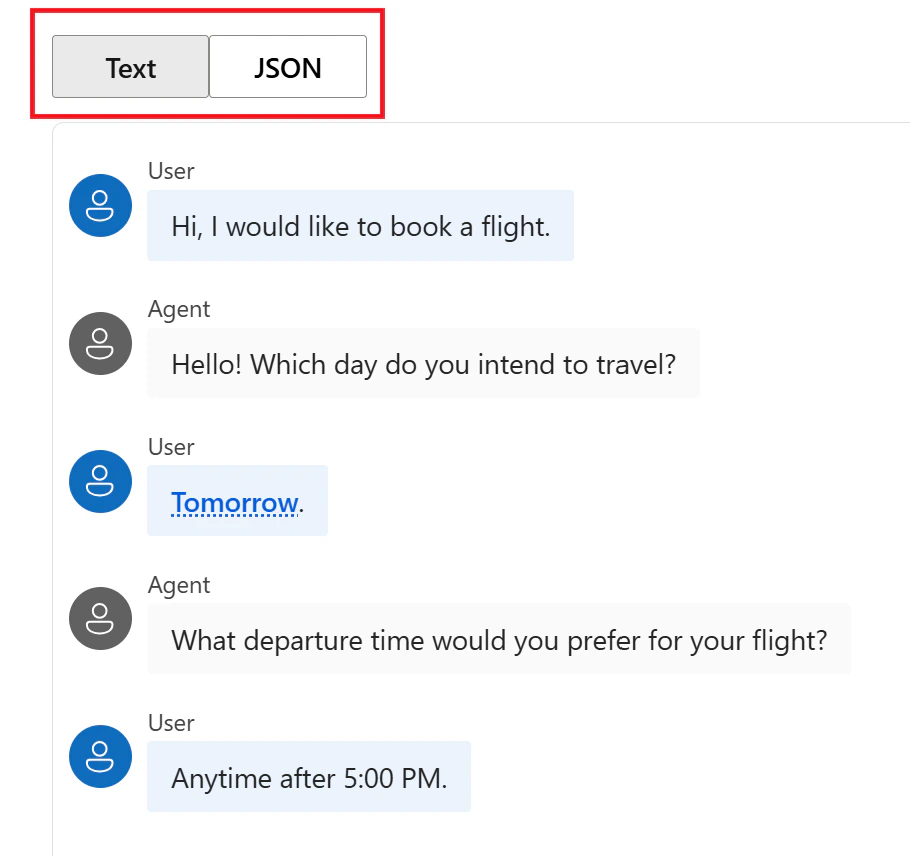 1. In the **Details** panel on the right, review the **Top Intent** and detected **Entities**.
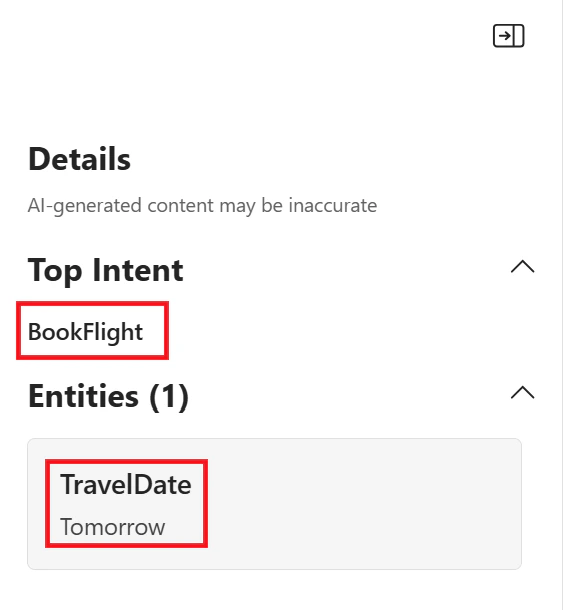 You successfully created a multi-turn CLU model with entity slot filling capabilities to collect required information across multiple dialog turns. To learn more about how CLU handles entity slot filling across conversation turns, see [Multi-turn conversations](../concepts/multi-turn-conversations).
## Troubleshooting
| Issue | Cause | Resolution |
| ----------------------------------------------------------------------------- | ----------------------------------------------------------------------------------------------------- | -------------------------------------------------------------------------------------------------------------------------------------------------------------------------------------------------------------------- |
| You don't see **Connected service** in the CLU project creation flow. | The Language resource isn't connected to your Foundry hub, or you don't have access. | Confirm the Language resource appears in **Management center** > **Connected resources**, then verify you have **Cognitive Services Language Owner** or **Cognitive Services Contributor** on the Language resource. |
| You can't select your OpenAI deployment during **Quick deploy with LLM**. | The model isn't deployed in your Foundry project, or you don't have access to the deployment. | Go to **Models + endpoints** and confirm the deployment exists. If needed, redeploy the model and try again. |
| You don't see the **Multi-turn** option in the playground. | You're not using Microsoft Foundry (classic), or you're not in the correct CLU playground experience. | Confirm you're in the classic portal at [https://ai.azure.com/](https://ai.azure.com/), then open the CLU playground and select the **Multi-turn** understanding option. |
| You get an authorization error when connecting resources or deploying models. | Missing Azure role assignments. | Verify your Azure role assignments for the subscription and the Language resource, then wait a few minutes for role propagation and try again. |
## Clean up resources
If you no longer need the Foundry project created for this quickstart, delete it to avoid ongoing charges for any deployed models.
If you created an OpenAI deployment for this quickstart, delete the deployment first:
1. In Microsoft Foundry (classic), go to **Models + endpoints**.
2. Select the deployment you created.
3. Select **Delete deployment**.
For more information, see [Deploy models in Foundry](https://learn.microsoft.com/en-us/azure/ai-foundry/how-to/deploy-models-managed).
To delete the Foundry project:
1. Go to [Microsoft Foundry (classic)](https://ai.azure.com/).
2. Select the project you want to delete.
3. Select **Management center**.
4. Select **Delete project**.
If you want to remove Azure resources, delete either the individual resource or the entire resource group. Deleting the resource group removes all contained resources.
If you plan to delete a resource that has model deployments, delete the deployments first.
## Related content
* [Multi-turn conversations in CLU](../concepts/multi-turn-conversations)
* [Build a multi-turn model](build-multi-turn-model)
You successfully created a multi-turn CLU model with entity slot filling capabilities to collect required information across multiple dialog turns. To learn more about how CLU handles entity slot filling across conversation turns, see [Multi-turn conversations](../concepts/multi-turn-conversations).
## Troubleshooting
| Issue | Cause | Resolution |
| ----------------------------------------------------------------------------- | ----------------------------------------------------------------------------------------------------- | -------------------------------------------------------------------------------------------------------------------------------------------------------------------------------------------------------------------- |
| You don't see **Connected service** in the CLU project creation flow. | The Language resource isn't connected to your Foundry hub, or you don't have access. | Confirm the Language resource appears in **Management center** > **Connected resources**, then verify you have **Cognitive Services Language Owner** or **Cognitive Services Contributor** on the Language resource. |
| You can't select your OpenAI deployment during **Quick deploy with LLM**. | The model isn't deployed in your Foundry project, or you don't have access to the deployment. | Go to **Models + endpoints** and confirm the deployment exists. If needed, redeploy the model and try again. |
| You don't see the **Multi-turn** option in the playground. | You're not using Microsoft Foundry (classic), or you're not in the correct CLU playground experience. | Confirm you're in the classic portal at [https://ai.azure.com/](https://ai.azure.com/), then open the CLU playground and select the **Multi-turn** understanding option. |
| You get an authorization error when connecting resources or deploying models. | Missing Azure role assignments. | Verify your Azure role assignments for the subscription and the Language resource, then wait a few minutes for role propagation and try again. |
## Clean up resources
If you no longer need the Foundry project created for this quickstart, delete it to avoid ongoing charges for any deployed models.
If you created an OpenAI deployment for this quickstart, delete the deployment first:
1. In Microsoft Foundry (classic), go to **Models + endpoints**.
2. Select the deployment you created.
3. Select **Delete deployment**.
For more information, see [Deploy models in Foundry](https://learn.microsoft.com/en-us/azure/ai-foundry/how-to/deploy-models-managed).
To delete the Foundry project:
1. Go to [Microsoft Foundry (classic)](https://ai.azure.com/).
2. Select the project you want to delete.
3. Select **Management center**.
4. Select **Delete project**.
If you want to remove Azure resources, delete either the individual resource or the entire resource group. Deleting the resource group removes all contained resources.
If you plan to delete a resource that has model deployments, delete the deployments first.
## Related content
* [Multi-turn conversations in CLU](../concepts/multi-turn-conversations)
* [Build a multi-turn model](build-multi-turn-model)